
Crispy Parmesan Artichoke Hearts Recipe for Perfect Appetizers

Crispy Parmesan Artichoke Hearts are an absolute delight that brings together the crunchy texture of Panko breadcrumbs and the rich, nutty flavor of Parmesan, all wrapped around tender artichoke hearts. Picture this: You pull a golden brown, crispy artichoke heart out of the oven, the smell of garlic and herbs wafting through the kitchen, making your stomach growl in anticipation. As you take a bite, the crispy exterior gives way to a tender, flavorful center that’s just bursting with savory goodness. It’s pure bliss. Now, let me take you back to the first time I made these beauties. I was hosting a gathering with friends, eager to impress them with my culinary skills. The game plan was simple: delicious snacks, good laughs, and maybe a little too much wine. Little did I know, these Crispy Parmesan Artichoke Hearts would steal the show, and my friends are still talking about them to this day. Great for parties, game nights, or just a cozy evening at home, they are a hit every time. Ingredients for Crispy Parmesan Artichoke Hearts Here’s what you’ll need to make this delicious Crispy Parmesan Artichoke Hearts: 2 cans Artichoke Hearts – Make sure they are drained and rinsed for the best texture and flavor. 1 cup Panko Breadcrumbs – These give a lovely crunch; regular breadcrumbs won’t provide the same crispy finish. 1/2 cup Grated Parmesan Cheese – Use freshly grated for the best flavor, but pre-grated can work in a pinch. 1 teaspoon Garlic Powder – Adds a savory depth that complements the artichokes beautifully. 1 teaspoon Dried Oregano – This herb brings a fragrant, earthy note that elevates the dish. 1/2 teaspoon Salt – A necessary seasoning to enhance all the flavors. 1/4 teaspoon Black Pepper – For a hint of heat and added flavor complexity. 2 large Eggs – Beaten, they act as a binder for the breadcrumbs. 1 tablespoon Olive Oil – Drizzling this gives our artichokes a lovely golden color and enhances their flavor while baking. How to Make Crispy Parmesan Artichoke Hearts Follow these simple steps to prepare this delicious Crispy Parmesan Artichoke Hearts: Step 1: Preheat Your Oven Preheat the oven to 400°F (200°C). This is crucial for achieving that perfectly crispy finish we all crave. Step 2: Prepare the Coating Mixture In a mixing bowl, combine Panko breadcrumbs, grated Parmesan cheese, garlic powder, oregano, salt, and black pepper. Mix everything thoroughly to get an even distribution of flavors. Step 3: Prepare the Artichoke Hearts Take each drained artichoke heart and dip it into the beaten eggs. This step is essential as it helps the breadcrumb mixture adhere to the artichokes. Step 4: Coat the Artichokes Roll the egg-dipped artichoke hearts in the breadcrumb mixture until they’re generously coated. Don’t be shy; we want them to be fully dressed in that crispy goodness. Step 5: Arrange on Baking Sheet Place the coated artichoke hearts on a baking sheet lined with parchment paper. You want a single layer here so that every piece gets that irresistible crunch. Step 6: Bake to Perfection Drizzle olive oil over the artichoke hearts before popping them in the oven. Bake for 20 minutes or until they are golden brown and crisp to perfection. The anticipation is killer, but trust me, it’ll be worth it! Once they are out of the oven, let them cool for a minute, and then serve them hot alongside your favorite dipping sauce—maybe a tangy aioli or a zesty marinara. These Crispy Parmesan Artichoke Hearts are not just appetizers; they are the conversation starters that will have your guests raving all night long. Get ready for the oohs and aahs to roll in! Perfecting Crispy Parmesan Artichoke Hearts Cooking Process Start by preheating your oven and mixing dry ingredients before preparing the artichokes. This efficient sequence allows you to assemble everything and maximize those delightful crispy layers while the oven heats up, ensuring perfect results. Add Your Touch to Crispy Parmesan Artichoke Hearts Feel free to swap out Panko breadcrumbs for crushed cornflakes for added crunch or try different cheeses like mozzarella or Asiago. You can also kick up the flavor with spices like paprika or cayenne pepper for a bit of heat. Storing & Reheating Crispy Parmesan Artichoke Hearts Store leftover artichoke hearts in an airtight container in the fridge for up to three days. For reheating, place them in a preheated oven at 350°F (175°C) for about 10 minutes to regain their crispiness. When I first made these Crispy Parmesan Artichoke Hearts for a family gathering, the explosion of flavor made everyone swoon. My aunt even asked me for the recipe, claiming it could rival any restaurant dish! FAQs About Crispy Parmesan Artichoke Hearts What is Crispy Parmesan Artichoke Hearts? Crispy Parmesan Artichoke Hearts are a delicious, crunchy appetizer made from artichoke hearts, coated in a flavorful mix of Panko breadcrumbs, Parmesan cheese, and seasonings. They are baked to golden perfection, creating a delightful contrast between the crunchy coating and the tender, flavorful inside. This dish not only makes for an impressive presentation but also delivers a fantastic flavor that can be enjoyed by everyone, from those just discovering artichokes to long-time fans of this unique veggie. How do you serve Crispy Parmesan Artichoke Hearts? These crispy treats are incredibly versatile when it comes to serving. You can enjoy them straight from the oven as a warm appetizer, dip them in ranch or marinara sauce for an added punch, or serve them alongside a fresh salad for a delightful lunch option. They also make a fantastic addition to charcuterie boards, showcasing their gourmet flair, and can even be included in party platters for an unforgettable bite-sized delight that will impress your guests. Can I prepare Crispy Parmesan Artichoke Hearts in advance? Yes, you can get ahead of the game with your Crispy Parmesan Artichoke Hearts! Prepare the coated artichokes and arrange them on a baking sheet. Cover them tightly with plastic wrap and store them in the refrigerator
Delicious Chipotle Corn Salsa Recipe for Fresh Flavor Boost
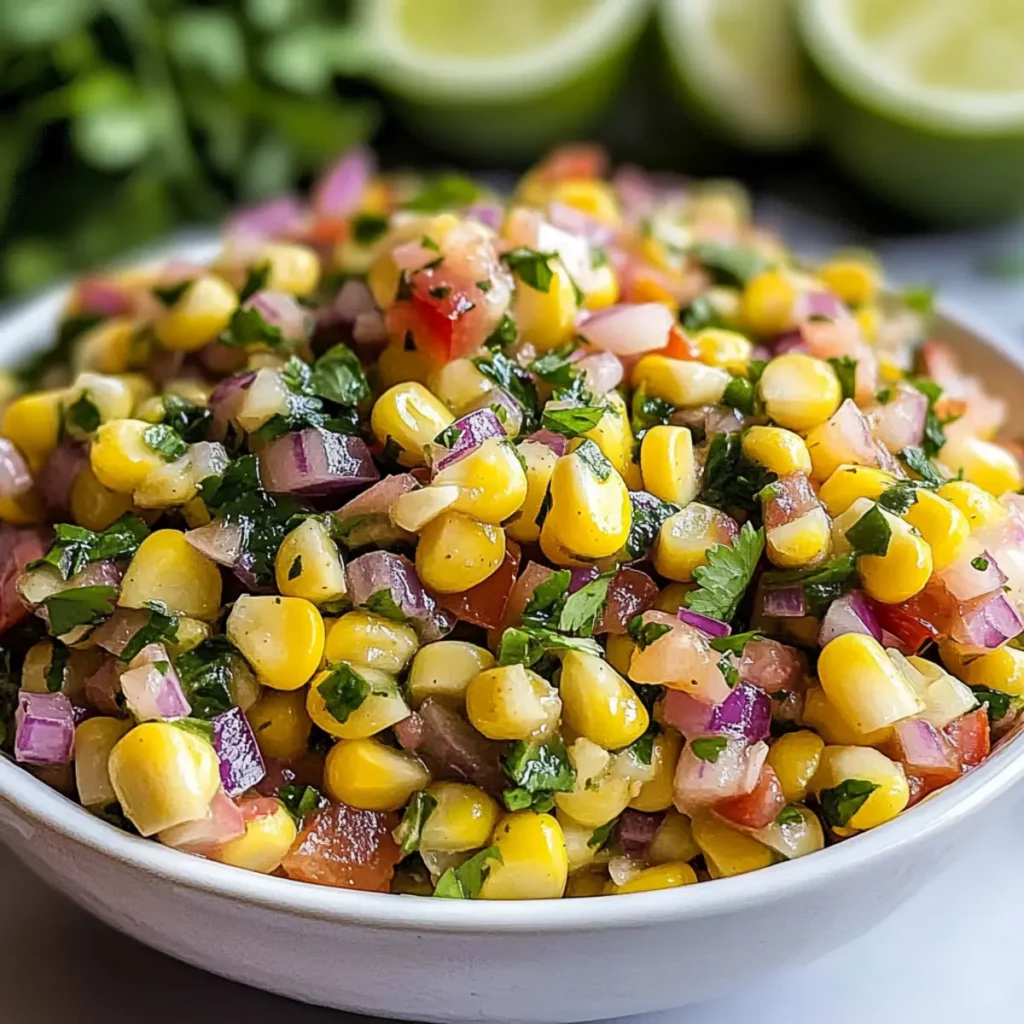
Chipotle Corn Salsa is a burst of flavor, freshness, and a little kick that can transform any ordinary meal into a fiesta. Imagine the sweet crunch of fresh corn, beautifully mingling with the zesty pop of lime and the smoky warmth of chipotle powder, all dancing together in perfect harmony. This salsa isn’t just a side dish; it’s the life of the party, whether it’s a summer barbecue, a cozy family dinner, or even simply snacking on a Tuesday afternoon. But wait, because this isn’t just your run-of-the-mill salsa. Picture yourself sitting down with friends, a bowl of this Chipotle Corn Salsa in front of you, and suddenly everyone’s talking about their day, laughing, sharing stories, all while dipping delicious tortilla chips into this vibrant, colorful concoction. It’s not just about the flavors; it’s about the memories we create around food, the moments that make us smile, and the bites that leave us begging for more! Ingredients for Chipotle Corn Salsa Here’s what you’ll need to make this delicious Chipotle Corn Salsa: 2 cups Corn kernels – Fresh is best, but frozen works wonders too! Make sure they’re thawed if using frozen. 1 medium Red onion – Sweet and colorful, add a little extra zing to your salsa. 1 medium Red bell pepper – Brings a sweet crunch and vibrant color to the mix. 1 medium Jalapeño – Adjust based on your heat tolerance. It’s the spicy friend of your flavor party. 1/4 cup Cilantro – Freshly chopped to enhance that bright, aromatic edge. 1 medium Lime – Juicy and zesty, it’s what ties all the flavors together! 1 teaspoon Chipotle powder – It adds that smoky element we all crave and gives your salsa that signature kick. 1/2 teaspoon Salt – Enhances all the flavors, making them pop. 1/4 teaspoon Black pepper – Adds a subtle warmth and depth to the salsa. How to Make Chipotle Corn Salsa Follow these simple steps to prepare this delicious Chipotle Corn Salsa: Step 1: Gather Your Ingredients Make sure to have all your ingredients on hand and ready to go. A large mixing bowl will be your best friend in this salsa-making journey! Step 2: Combine the Base Ingredients In a large bowl, combine the corn kernels, diced red onion, chopped red bell pepper, and finely diced jalapeño. Just visualize the beautiful colors coming together—it’s like a vivid sunset in your bowl. Step 3: Add Freshness with Cilantro and Lime Toss in the chopped cilantro and squeeze the juice from the lime into the mix. The fragrance of fresh cilantro mingling with lime juice will make your taste buds do a little happy dance. Step 4: Season It Up Sprinkle the chipotle powder, salt, and black pepper over your colorful creation. These spices are the secret agents that take the salsa from good to unforgettable! Step 5: Mix It Well Using a spatula or wooden spoon, gently mix everything together, making sure the flavors meld without smashing those beautiful veggies. Step 6: Chill Out (Optional) For the best flavor, cover the bowl and let the salsa chill in the refrigerator for about 15-30 minutes. This allows the flavors to blend, but if you’re impatient, dig in right away! Now that your Chipotle Corn Salsa is ready, grab a handful of tortilla chips and dig into that bowl of deliciousness. It’s the perfect accompaniment to any taco night, a glorious topping for grilled meats, or simply a snack that may vanish faster than your friends can say “yum!” Eating Chipotle Corn Salsa isn’t just a joyful explosion of flavors; it’s a friendly reminder that food brings us together, creating cherished memories one bite at a time. Enjoy making this at home and personalize it to suit your tastes—whether that means more heat, extra lime, or perhaps a touch of sweetness with diced mango. After all, the best recipes are those that reflect YOU! Perfecting Chipotle Corn Salsa Cooking Process To achieve the best results when making Chipotle Corn Salsa, start by prepping all your ingredients first. Chop the veggies, then mix them together in a bowl while squeezing the lime juice and adding spices. This ensures all flavors meld beautifully and saves you time. Add Your Touch to Chipotle Corn Salsa Feel free to customize your Chipotle Corn Salsa! Swap out the red onion for green onions, use fresh tomatoes if you want a juicier salsa, or switch out the cilantro for fresh parsley for a different flavor profile. The possibilities are endless! Storing & Reheating Chipotle Corn Salsa Store your Chipotle Corn Salsa in an airtight container in the fridge for up to three days. The flavors deepen as it sits. For reheating, enjoy it chilled or bring it to room temperature; no need to heat it up! One time, I made this Chipotle Corn Salsa for a family reunion. Everyone loved it so much that it disappeared before the main course! It reminded me how a simple salsa can bring people together, laughter, and compliments with every bite. FAQs About Chipotle Corn Salsa What is Chipotle Corn Salsa? Chipotle Corn Salsa is a fresh, vibrant salsa that combines sweet corn with a medley of colorful ingredients such as red onion, red bell pepper, jalapeño, and cilantro, all tied together with zesty lime juice. The addition of chipotle powder brings a smoky kick that elevates this dish to something special. This salsa serves as a perfect accompaniment to tacos, grilled meats, or even as a dip for tortilla chips, making it a favorite for gatherings and everyday meals alike. How can I serve Chipotle Corn Salsa? Chipotle Corn Salsa is incredibly versatile and shines in many settings. You can serve it as a refreshing dip with tortilla chips, a topping for tacos, or even alongside grilled chicken or fish. It makes a great addition to burrito bowls, and can be used to brighten up sandwiches and wraps. Just imagine the colorful burst of flavors that this salsa brings to your table,
Easy Garlic Parmesan Focaccia Bread Recipe for Beginners
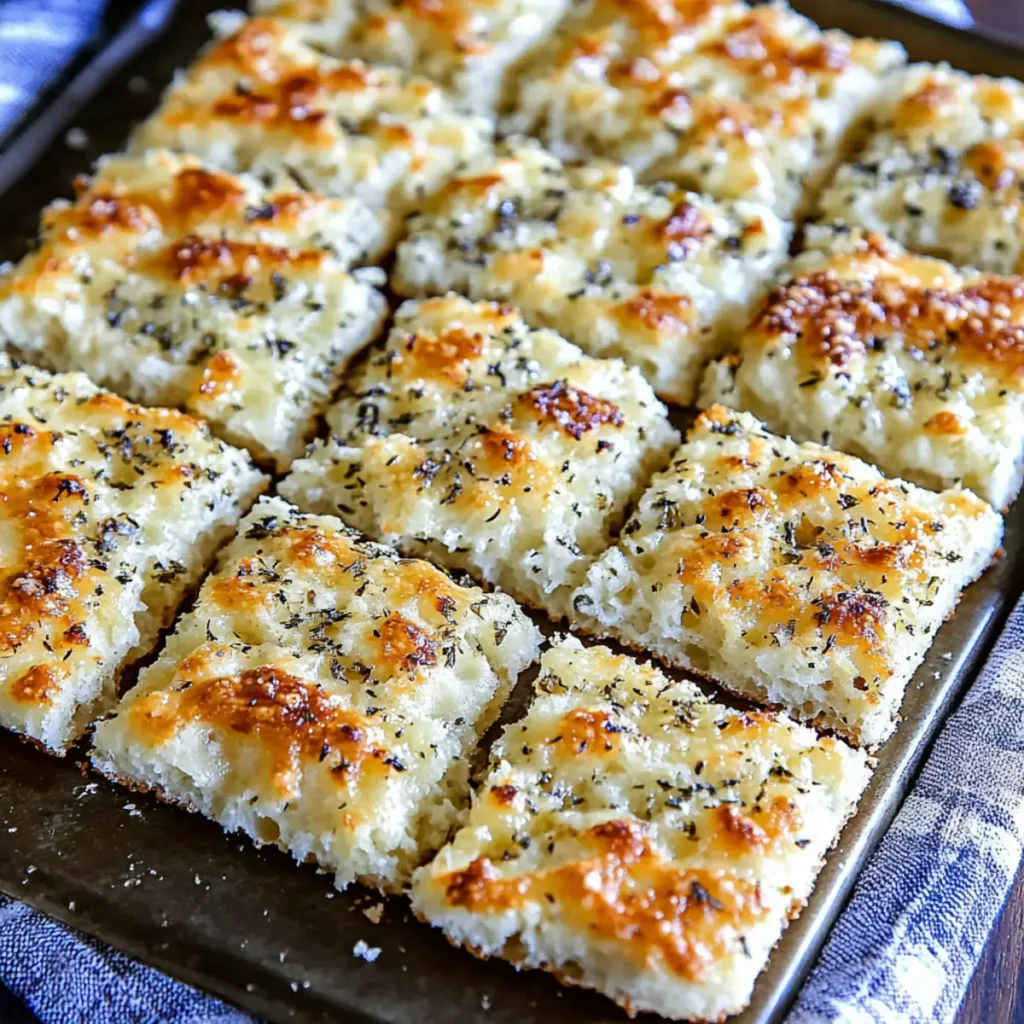
Garlic Parmesan Focaccia Bread is the kind of warm, fluffy bread that makes you feel like you’re sitting in an Italian café, even if you’re in your kitchen wearing pajamas. Imagine breaking open a golden-brown loaf, with aromas of garlic and cheesy goodness wafting through your home, making even the neighbors a bit envious. This focaccia isn’t just bread; it’s a hug for your taste buds and a conversation starter at your next gathering. Now, think about cozy Sunday afternoons or potlucks when the crowd demands something delicious but effortless. This Garlic Parmesan Focaccia Bread fits the bill perfectly. Win over your friends, impress your family, or just indulge in some culinary therapy yourself. Your kitchen will smell divine, and you’ll be savoring this delectable bread in no time. Ingredients for Garlic Parmesan Focaccia Bread Here’s what you’ll need to make this delicious Garlic Parmesan Focaccia Bread: 4 cups all-purpose flour – The foundation of your focaccia, providing just the right texture and chew for the bread. 2 tsp active dry yeast – This is what will make your bread rise and give it that delightful fluffiness. 1 ¾ cups warm water (110°F) – Helps activate the yeast; too hot, and it’ll kill it, too cold, and it won’t rise. ¼ cup extra virgin olive oil – Adds richness and flavor to both the dough and the topping for that mouthwatering finish. 4 cloves fresh garlic, minced – The star of the show, lending fragrant warmth and robust flavor to your bread. 1 cup grated Parmesan cheese – Because who doesn’t love cheese? It creates a savory crust that will have you coming back for more. 2 tsp sea salt – Essential for enhancing flavors and ensuring your bread isn’t bland. How to Make Garlic Parmesan Focaccia Bread Follow these simple steps to prepare this delicious Garlic Parmesan Focaccia Bread: Step 1: Activate the Yeast In a small bowl, combine 1 ¾ cups of warm water and 2 teaspoons of active dry yeast. Let this mixture sit for about 5 minutes until it becomes frothy. This bubbling action is the yeast awakening, gearing up to do its magical rising. Step 2: Mix the Dry Ingredients In a large mixing bowl, combine 4 cups of all-purpose flour and 2 teaspoons of sea salt. Give it a little stir to mix evenly, ensuring that the salt is well distributed. This is where the flavor journey begins. Step 3: Combine Wet and Dry Ingredients Add the frothy yeast mixture and ¼ cup of extra virgin olive oil into the dry ingredients. Use a wooden spoon or spatula to stir until it forms a shaggy dough. Don’t worry about it looking perfect; we’re on our way to greatness here. Step 4: Knead the Dough Sprinkle some flour onto your working surface and turn out your shaggy dough. Knead it for about 7 minutes until it’s smooth and elastic. You’ll want to channel your inner baker during this step – it’s therapeutic and the dough will thank you for it. Step 5: Let It Rise Place the kneaded dough into an oiled bowl, cover it with a clean kitchen towel, and let it rise in a warm spot for about an hour. It should double in size, creating more airy pockets inside the bread. Patience is the key! Step 6: Shape and Bake Once the dough is ready, punch it down to release air. Transfer it to an oiled baking sheet and stretch it to about ½ inch thick. Use your fingers to create dimples on the surface, which will hold all the garlic and cheese goodness. Preheat your oven to 425°F (220°C), brush the surface with olive oil, sprinkle the minced garlic and 1 cup of grated Parmesan cheese. Bake for about 25 minutes until it turns golden brown and you can’t resist the heavenly aroma wafting through your kitchen. Slice, serve, and don’t forget to enjoy every buttery, cheesy bite of your Garlic Parmesan Focaccia Bread. Perfect as a snack, appetizer, or side dish, this bread is bound to steal the spotlight at any gathering! Perfecting Garlic Parmesan Focaccia Bread Cooking Process Start by activating your yeast while mixing the flour and salt. Knead the dough until it’s smooth, then let it rise. Once doubled, shape and dimple the dough before adding your toppings. Brush with olive oil for that golden finish. Add Your Touch to Garlic Parmesan Focaccia Bread Feel free to swap the Parmesan with pecorino for a sharper taste or add herbs like rosemary for a fragrant twist. Experiment with toppings like sun-dried tomatoes or olives for a Mediterranean vibe. Storing & Reheating Garlic Parmesan Focaccia Bread To maintain freshness, store your focaccia in an airtight container at room temperature. For reheating, pop it in a 350°F oven for about 5-10 minutes to restore its crispness without drying it out. It was my cousin’s birthday, and I surprised everyone with this Garlic Parmesan Focaccia Bread. The look on their faces when they tasted it was priceless; they devoured the whole loaf in minutes! FAQs About Garlic Parmesan Focaccia Bread What is Garlic Parmesan Focaccia Bread? Garlic Parmesan Focaccia Bread is a delicious Italian-style flatbread enhanced with the robust flavors of garlic and the rich, nutty taste of Parmesan cheese. This bread is famously pillowy and soft on the inside with a delightful golden-brown crust that contrasts beautifully with its flavorful toppings. It’s versatile, making it perfect for serving with soups, as a sandwich base, or simply on its own with a drizzle of olive oil. The combination of garlic and Parmesan creates an aromatic and savory treat that leaves everyone wanting more. How can I customize my Garlic Parmesan Focaccia Bread? Customization is one of the best features of Garlic Parmesan Focaccia Bread. You can experiment with different cheese options like feta for a tangy twist or mozzarella for a gooey delight. Mixing in herbs like rosemary, oregano, or thyme adds aromatic notes that elevate the flavor profile. You
Delicious Crockpot Spinach Artichoke Dip Recipe for Easy Entertaining
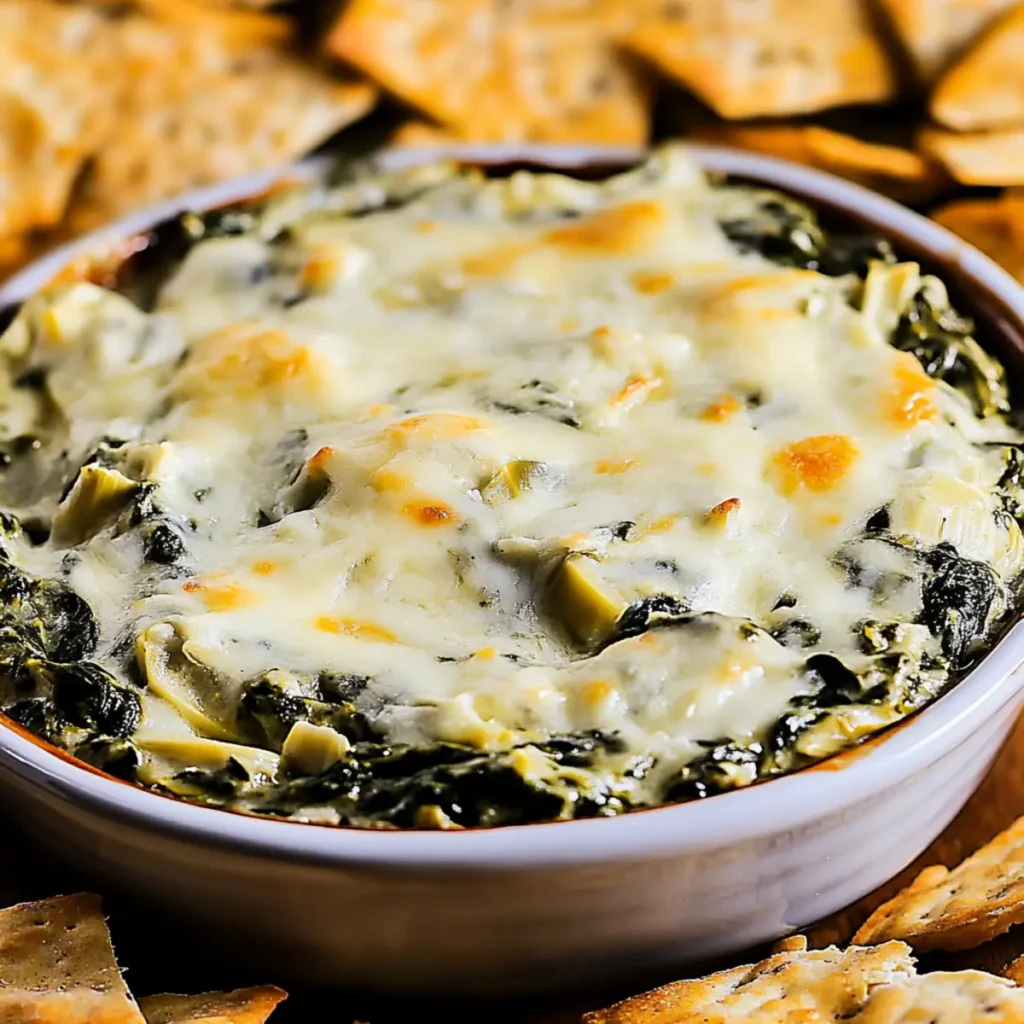
There’s something truly magical about the aroma of warm, melted cheese wafting through your home, mingling with the earthy notes of spinach and the subtle, briny allure of artichokes. This is not just any dip; this is the ultimate party pleaser—the Crockpot Spinach Artichoke Dip. Whether it’s game day, a cozy movie night, or a gathering of friends, this dish is sure to steal the show, leaving everyone clamoring for seconds. Imagine the anticipation of peeling back the lid of your crockpot to unveil a bubbling, cheesy masterpiece. Invite your friends over and engage in the delightful ritual of transferring this creamy dip onto crunchy tortilla chips, each scoop revealing a lush, gooey goodness that promises to tantalize your taste buds. Get ready to embark on a flavor journey that is as easy as it is delicious! Ingredients for Crockpot Spinach Artichoke Dip Here’s what you’ll need to make this delicious Crockpot Spinach Artichoke Dip: 10 ounces fresh spinach – Use baby spinach for a tender texture and vibrant greens. Fresh is best, but frozen works in a pinch. 14 ounces canned artichoke hearts – Choose artichoke hearts packed in water or marinated for added flavor. Drain and chop them to enhance their softness. 8 ounces cream cheese – Use full fat for the richest flavor or lower fat for a lighter option. Soften for easy mixing. ½ cup sour cream – Adds a tangy richness that complements the other ingredients beautifully. ¼ cup mayonnaise – This creamy component adds depth; choose a light version if desired without losing flavor. ½ cup shredded Parmesan cheese – Freshly grated will melt better and taste far superior to pre-packaged for the best results! ½ cup shredded mozzarella cheese – Mozzarella provides that ooey-gooey stretch that everyone loves. 1 teaspoon garlic powder – For that aromatic kick; fresh minced garlic can also be used for a bolder flavor. Salt and pepper to taste – Season to enhance the flavors to your liking. How to Make Crockpot Spinach Artichoke Dip Follow these simple steps to prepare this delicious Crockpot Spinach Artichoke Dip: Step 1: Prepare the Vegetables Start by washing the fresh spinach thoroughly to remove any grit. Chop the drained artichoke hearts into bite-sized pieces for easy dipping. Step 2: Mix the Ingredients In your trusty crockpot, combine the spinach, chopped artichokes, cream cheese, sour cream, mayonnaise, both cheeses, garlic powder, and season with salt and pepper. Mix until everything is well incorporated and looking creamy. Step 3: Set the Temperature Cover the crockpot and cook on low for 2 hours or high for just 1 hour. Stir it occasionally to ensure even cooking; it’s like giving your dip a little love while it heats up. Step 4: Adjust the Consistency After cooking, check the dip’s consistency. If it seems too thick for your liking, just add a splash of milk to reach that perfect creamy texture. Step 5: Serve and Enjoy Once it’s warm and gooey, grab a bowl and transfer the dip into it. Serve it hot with your favorite tortilla chips, crispy slices of baguette, or fresh vegetable sticks for an extra crunch. Get ready for everyone to gather around, dip in hand, because this Crockpot Spinach Artichoke Dip is about to become your go-to dish for any occasion. You Must Know About Crockpot Spinach Artichoke Dip This showstopping Crockpot Spinach Artichoke Dip delivers restaurant-quality results using simple ingredients you probably already have at home. The perfect balance of textures and flavors creates an unforgettable dining experience that will have everyone asking for seconds. Picture-perfect presentation with vibrant colors makes this dish absolutely Instagram-worthy and guaranteed to impress any dinner guest. Incredibly versatile recipe that works beautifully for weeknight dinners, meal prep, special occasions, or even outdoor entertaining sessions. Perfecting Crockpot Spinach Artichoke Dip Cooking Process Start by washing the fresh spinach and chopping the artichoke hearts. Then mix all ingredients in the crockpot, ensuring everything blends well before setting it to cook on low. This method ensures even heating and perfect consistency. Add Your Touch to Crockpot Spinach Artichoke Dip Feel free to swap the cheeses for something creamier or add in cooked bacon for a smoky twist. You could also include some chopped sun-dried tomatoes or a sprinkle of red pepper flakes to elevate the flavor profile. Storing & Reheating Crockpot Spinach Artichoke Dip Store leftovers in an airtight container in the fridge for up to three days. When reheating, warm gently in the microwave or on the stove with a splash of milk to restore creaminess without overcooking. Sharing this dish at a recent gathering made me realize how quickly it disappeared. My friends kept coming back for more, leaving me with barely any leftovers to enjoy the next day. It’s definitely a crowd-pleaser! FAQs About Crockpot Spinach Artichoke Dip What is Crockpot Spinach Artichoke Dip? Crockpot Spinach Artichoke Dip is a delicious, creamy appetizer that combines fresh spinach, artichoke hearts, cream cheese, and various cheeses for a rich flavor. Cooked slowly in a crockpot, this dish reaches perfect creaminess while allowing all the flavors to blend beautifully. It’s perfect for parties, game days, or any gathering. With its warm, gooey texture and savory taste, it’s no wonder this dip has become a crowd favorite. Can I make Crockpot Spinach Artichoke Dip ahead of time? Absolutely! You can prepare the Crockpot Spinach Artichoke Dip ingredients in advance and store them in the fridge. Just mix everything in the crockpot and refrigerate overnight. When you’re ready to serve, cook it on low for a couple of hours. This way, you’ll save time during your event and still enjoy a delicious, freshly made dip. Just be sure to stir it occasionally for even heating. What can I serve with Crockpot Spinach Artichoke Dip? Crockpot Spinach Artichoke Dip pairs wonderfully with a variety of dippers. Popular choices include tortilla chips, sliced baguette, pretzel bites, and fresh vegetables like carrot sticks or bell pepper slices. You could also serve it
Delicious Million Dollar Dip Recipe for Your Next Party Snack

Imagine a creamy, dreamy concoction that’s as addictive as your favorite pair of sweatpants. This Million Dollar Dip is the superhero of snacks, featuring a luscious blend of cream cheese, sour cream, cheddar cheese, and more—all wrapped up in an irresistible package that’ll have your taste buds singing. Make it for a party, enjoy it during your beloved Netflix binge sessions, or simply whip it up to reward yourself after a long day. Trust me, once you taste it, you’ll understand why people are willing to pay “millions” for just one more bite! The best part? This dip is so easy to whip up that even kitchen novices will impress themselves! Just blend, chill, and serve to your party guests who will undoubtedly be begging for the recipe. So, grab your mixing bowl and see how this Million Dollar Dip can become your new go-to appetizer! Ingredients for Million Dollar Dip Here’s what you’ll need to make this delicious Million Dollar Dip: 8 oz cream cheese – Make sure it’s softened for easy mixing and a creamy texture. 1 cup sour cream – Adds a tangy creaminess that perfectly complements the other flavors. ½ cup mayonnaise – Helps create a rich and luscious consistency. If you’re feeling adventurous, try Greek yogurt for a healthier twist! 1 cup shredded sharp cheddar cheese – Choose sharp cheddar for that extra flavor punch that really pulls it all together. ½ cup bacon bits – Real or turkey—either will bring that crunchy, savory goodness. You can also use crumbled bacon if you prefer. ¼ cup green onions – Sliced for a fresh crunch and a pop of color. How to Make Million Dollar Dip Follow these simple steps to prepare this delicious Million Dollar Dip: Step 1: Mix the Base In a large mixing bowl, combine the softened cream cheese, sour cream, and mayonnaise until the mixture is smooth and creamy. Don’t be shy—this is where the magic begins! Step 2: Fold in the Cheddar and Bacon Gently fold in the shredded sharp cheddar cheese and bacon bits to add depth and flavor. Make sure you’re not too rough here; we want to keep that lovely creaminess intact! Step 3: Add the Green Onions Stir in the sliced green onions for that refreshing crunch and added brightness. Feel free to adjust the amount if you want more onion flavor. Step 4: Season to Taste Season your dip with salt and pepper according to your taste preference. Remember, a little seasoning goes a long way in letting those flavors shine! Step 5: Chill to Perfection Cover the bowl with plastic wrap and refrigerate for at least one hour. This step is crucial, as it allows all those incredible flavors to meld together beautifully. Step 6: Serve and Enjoy When you’re ready to wow your guests, serve the dip chilled with an assortment of crackers or fresh vegetables. Trust me, it won’t last long on the table! In just six steps, you can whip up a bowl of goodness that is perfect for any occasion. Whether it’s a game day gathering, a fancy cocktail party, or just a cozy night in, this Million Dollar Dip is always a hit. You might even find yourself making it on repeat! This showstopping Million Dollar Dip delivers restaurant-quality results using simple ingredients you probably already have at home. The perfect balance of textures and flavors creates an unforgettable dining experience that will have everyone asking for seconds. Picture-perfect presentation with vibrant colors makes this dish absolutely Instagram-worthy and guaranteed to impress any dinner guest. Incredibly versatile recipe that works beautifully for weeknight dinners, meal prep, special occasions, or even outdoor entertaining sessions. Perfecting Million Dollar Dip Cooking Process Start by combining softened cream cheese, sour cream, and mayonnaise in a mixing bowl. Mix them thoroughly until smooth, then fold in shredded cheddar and bacon bits. Finally, stir in green onions for that fresh pop. Add Your Touch to Million Dollar Dip Feel free to get creative! Swap out the cheddar for pepper jack if you like a kick, or add chopped jalapeños for extra zest. You could also switch bacon bits for chopped pecans for a delightful crunch. Storing & Reheating Million Dollar Dip To store, place Million Dollar Dip in an airtight container and keep it refrigerated for up to three days. If you need to reheat, do so gently in the microwave to preserve texture and flavor. Adding this dip to your menu reminds me of the time I made it for a big family gathering. Everyone raved about how creamy and delicious it was, and someone even asked for the recipe before the night was over! FAQs About Million Dollar Dip What is Million Dollar Dip? Million Dollar Dip is a creamy, savory appetizer that packs a punch of flavors. This dip is typically made with cream cheese, sour cream, mayonnaise, and sharp cheddar cheese, mixed with bacon bits and green onions. It’s perfect for parties, game days, or simply as a snack at home. Known for its rich and delicious taste, this dip truly lives up to its fancy name, impressing everyone who tries it. How do I make Million Dollar Dip? To make Million Dollar Dip, you start by mixing softened cream cheese, sour cream, and mayonnaise until smooth. Next, fold in shredded sharp cheddar cheese and bacon bits for that irresistible flavor. Finally, add sliced green onions to give it a fresh crunch. After combining all your ingredients, let the dip chill in the fridge for at least an hour to allow the flavors to meld beautifully. Can I customize my Million Dollar Dip? Absolutely! Million Dollar Dip is incredibly versatile. You can swap the cheddar cheese for pepper jack if you want a little heat or add jalapeños for extra zest. If you prefer a different texture, try incorporating nuts like chopped pecans for a delightful crunch. You can also ditch the bacon bits for a vegetarian version by using sun-dried
Delicious Sea Salt & Oregano Domino Potatoes Recipe for Crispy Perfection
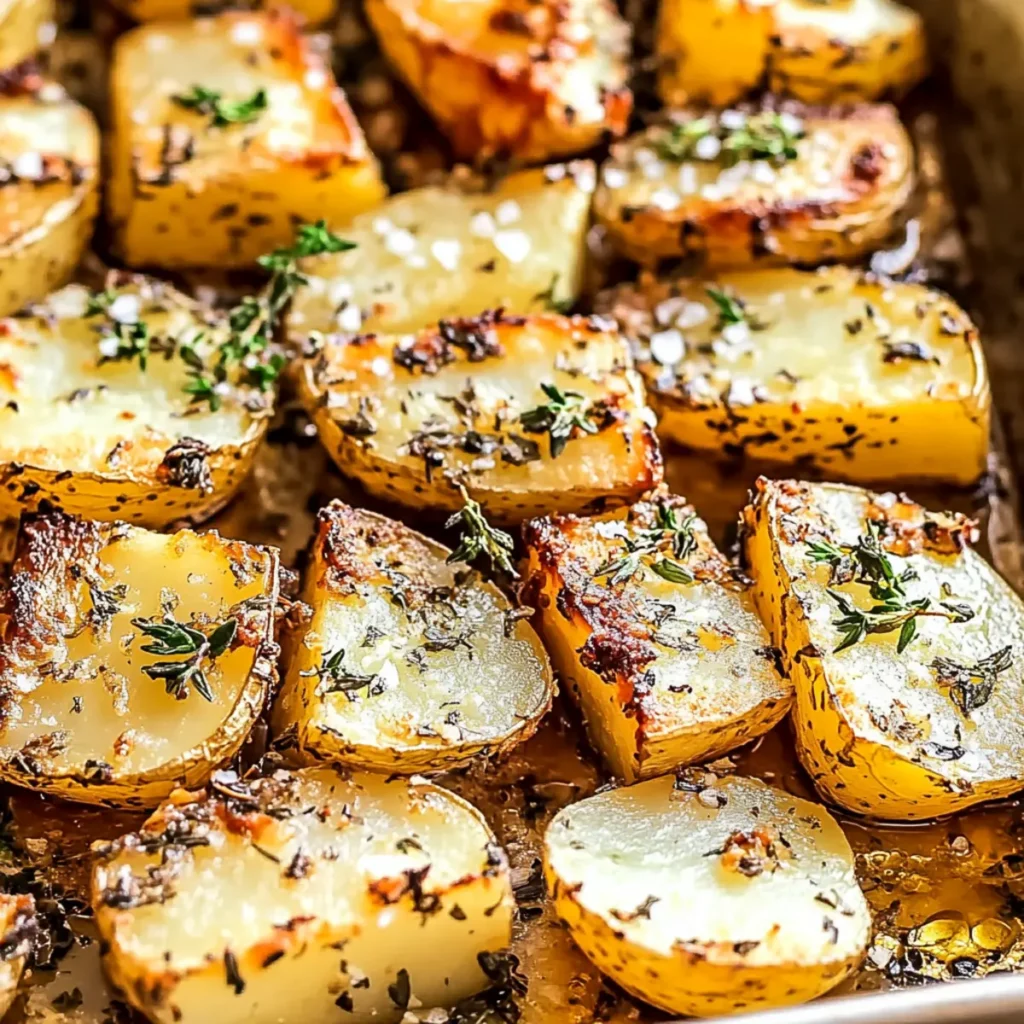
There’s nothing quite like the crunch of perfectly roasted potatoes drizzled in olive oil and sprinkled with sea salt and oregano. The aroma wafts through the air, beckoning you closer toward a vision of golden-brown perfection. These Sea Salt & Oregano Domino Potatoes are not just a side dish; they are the star of the dinner table that leaves your meal feeling complete and utterly delightful. Picture this: you’ve had a long day, and as you start prepping dinner, the excitement grows when you realize just how simple yet extraordinary these domino-shaped spuds can be. Whether for a casual weeknight dinner or a festive gathering, this recipe will have your family and friends asking for seconds—and maybe even thirds! Ingredients for Sea Salt & Oregano Domino Potatoes Here’s what you’ll need to make this delicious Sea Salt & Oregano Domino Potatoes: 2 medium Yukon Gold potatoes – These waxy potatoes have a rich flavor and creamy texture that turn crispy when roasted. Their shape is perfect for cutting into domino pieces. 2 tbsp extra virgin olive oil – This adds a wonderful richness and helps achieve that irresistible golden-brown crispiness. High-quality olive oil makes all the difference! 1 tsp coarse sea salt – Ample salt enhances the flavor of the potatoes, giving each bite a tantalizing crunch. Feel free to adjust to taste! 1 tsp dried oregano (or 1 tbsp fresh oregano) – This herb brings a fragrant, earthy quality that perfectly complements the golden potatoes. Fresh is always a vibrant option if available! 1/2 tsp freshly cracked black pepper – A hint of spice rounds out the flavor profile, adding depth to this simple dish. How to Make Sea Salt & Oregano Domino Potatoes Follow these simple steps to prepare this delicious Sea Salt & Oregano Domino Potatoes: Step 1: Preheat the Oven Begin by preheating your oven to 425°F (220°C). This temperature is crucial for that golden crisp you crave! Step 2: Prepare the Potatoes Wash and peel your Yukon Gold potatoes. Carefully cut them into domino shapes, which should resemble rectangles about an inch thick. Our goal is all about texture here, folks! Step 3: Season the Potatoes In a large bowl, toss the potato pieces with the olive oil, sea salt, oregano, and cracked black pepper until each piece is beautifully coated. Make sure they’re uniformly dressed for the ultimate flavor experience! Step 4: Arrange for Roasting Spread the seasoned potatoes in a single layer on a parchment-lined baking sheet. One layer is like the VIP section for your potatoes—no overcrowding, please! Step 5: Roast to Perfection Roast in the preheated oven for about 30-35 minutes or until they’re golden brown and crispy. Halfway through cooking, be sure to flip the potatoes for that uniform crispiness. Trust me, it’s worth it! Step 6: Cool and Serve Once the potatoes are done, let them cool slightly before serving. For an extra touch, garnish with a sprinkle of fresh oregano. Voilà! You’ve whipped up a delightful side dish. Serve these Sea Salt & Oregano Domino Potatoes alongside your favorite protein or enjoy them on their own as a tantalizing snack. They’re perfect for any occasion and will surely become a staple in your kitchen repertoire! As you dig into these golden delights, take a moment to relish not just their taste but the joy of having whipped them up all by yourself. With just a handful of ingredients, you’ve turned humble potatoes into a dish anyone would rave about. Happy cooking! Perfecting Sea Salt & Oregano Domino Potatoes Cooking Process To create the best Sea Salt & Oregano Domino Potatoes, prep your ingredients first. Start by washing and cutting the potatoes, while your oven preheats. This timing ensures the potatoes go straight into the oven, maximizing that oven-fresh crispiness. Add Your Touch to Sea Salt & Oregano Domino Potatoes Make this dish your own by experimenting with different herbs like rosemary or thyme, or by adding garlic for a flavorful kick. Sweet potatoes can also be swapped in for a unique twist on this classic recipe. Storing & Reheating Sea Salt & Oregano Domino Potatoes Store any leftovers in an airtight container in the fridge for up to three days. To enjoy them again, simply reheat in the oven at 350°F until crispy, keeping them far away from the microwave if you want to avoid sad, soggy potatoes. I remember making Sea Salt & Oregano Domino Potatoes for a cozy gathering with friends. They were such a hit that I barely had any leftovers, which is saying something considering I made an extra batch “just in case.” It felt fantastic to see everyone enjoying them! FAQs About Sea Salt & Oregano Domino Potatoes What is Sea Salt & Oregano Domino Potatoes? Sea Salt & Oregano Domino Potatoes are a delightful side dish featuring Yukon Gold potatoes seasoned with olive oil, coarse sea salt, and dried oregano. The potatoes are cut into rectangular “domino” shapes, which allows for even cooking and a crispy exterior. Roasted to perfection, these potatoes are versatile enough to complement any meal, making them a favorite at family dinners or gatherings with friends. Their golden-brown, crunchy texture and savory flavor make them an irresistible treat. How do I get my Sea Salt & Oregano Domino Potatoes crispy? To achieve maximum crispiness with your Sea Salt & Oregano Domino Potatoes, ensure they are cut uniformly into domino shapes and not overcrowded on the baking sheet. The preheated oven helps create that crispy outer layer, so it’s crucial to roast them at 425°F. Flipping them halfway through cooking also promotes even browning. If you want extra crunch, consider parboiling the potatoes before roasting, which allows steam to escape while they cook. Can I add other ingredients to Sea Salt & Oregano Domino Potatoes? Absolutely! One of the great things about Sea Salt & Oregano Domino Potatoes is their versatility. Feel free to add ingredients like garlic, rosemary, or thyme for a flavor twist. You could also
Quick and Easy Garlic Butter Steak Bites Recipe for Home Cooks
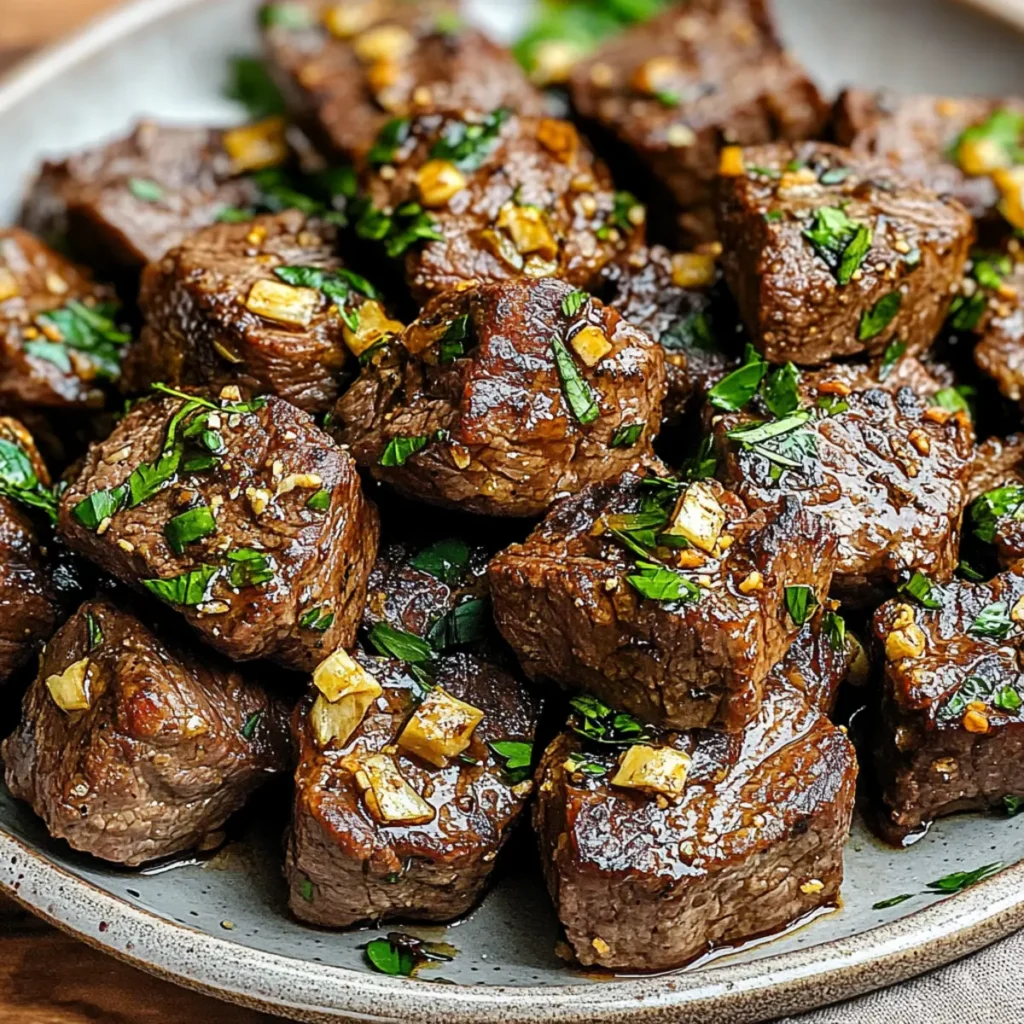
The incredible aroma of sizzling Garlic Butter Steak Bites will have your mouth watering before you even take a bite. With just a few simple ingredients, this dish transforms ordinary steak into a flavor-packed delight that’s perfect for any occasion. Whether it’s a cozy dinner at home or an impressive treat for guests, these steak bites deliver a fantastic culinary experience. In just 20 minutes, you can whip up these gorgeous bites that are both tender and bursting with flavor. Imagine juicy steak cubes bathed in rich garlic butter, garnished with vibrant parsley, and ready to tantalize your taste buds. Who knew a meal this delicious could be so easy? Ingredients for Garlic Butter Steak Bites Here’s what you’ll need to make this delicious Garlic Butter Steak Bites: 1 lb sirloin or ribeye steak – Choose a tender cut for the best flavor, and remember, a little marbling goes a long way. 4 tbsp unsalted butter – Using unsalted butter allows you to control the seasoning and enhances the rich flavors of the garlic. 4 cloves garlic, minced – Fresh garlic provides a powerful flavor punch; don’t skimp on this essential ingredient. Salt and pepper to taste – Simple seasonings that elevate the taste and highlight the steak’s natural flavors. 2 tbsp fresh parsley, chopped – This adds a fresh burst of color and brightness to finish the dish beautifully. How to Make Garlic Butter Steak Bites Follow these simple steps to prepare this delicious Garlic Butter Steak Bites: Step 1: Season the Steak Generously season the cubed steak with salt and pepper. Don’t be shy; this step is crucial for ensuring every bite is packed with flavor. Step 2: Heat the Skillet In a large skillet over medium-high heat, melt 2 tablespoons of butter until it’s bubbling enticingly. Take a moment to enjoy that delicious aroma. Step 3: Sear the Steak Bites Add the steak cubes in a single layer. Sear them for about 2-3 minutes on each side until they develop a beautiful brown crust. Don’t overcrowd—give them some breathing room! Step 4: Add Garlic and More Butter Once the steak is cooked to your liking, toss in the minced garlic and the remaining 2 tablespoons of butter. Stir until everything is well combined and that heavenly garlic aroma fills the kitchen. This should only take about a minute. Step 5: Serve and Garnish Remove the skillet from heat and sprinkle the steak bites with the chopped parsley. Transfer the sizzling, buttery goodness onto a serving plate. Step 6: Enjoy! Dig in right away and relish these tender Garlic Butter Steak Bites! Perhaps with a side of crusty bread to soak up all that delicious sauce, if you’re feeling indulgent. This recipe is an absolute game-changer for last-minute dinners or when you’re just craving something delightfully savory. Each bite delivers a satisfying crunch followed by tender steak wrapped in warm, buttery love. Your family and friends won’t even believe how easy it was to prepare this culinary masterpiece. So why wait? Make these Garlic Butter Steak Bites tonight, and discover why they quickly become everyone’s favorite! Perfecting Garlic Butter Steak Bites Cooking Process Start by seasoning your steak cubes with salt and pepper. Next, melt butter in a hot skillet and sear the steak until browned, adding garlic and remaining butter to create a savory sauce. Add Your Touch to Garlic Butter Steak Bites Feel free to swap the steak for chicken or shrimp to suit your palate. Enhance the flavor with extra herbs like thyme or rosemary or spice things up with a pinch of red pepper flakes. Storing & Reheating Garlic Butter Steak Bites To store, place leftovers in an airtight container in the fridge for up to three days. Reheat gently in a skillet on low heat to maintain tenderness and flavor. Sharing this dish at dinner parties has always resulted in rave reviews. Friends and family can’t resist sneaking in for a second helping, making me feel like a culinary wizard! FAQs About Garlic Butter Steak Bites What is Garlic Butter Steak Bites? Garlic Butter Steak Bites are succulent cubes of steak, sautéed in a rich garlic-infused butter sauce. This dish delivers restaurant-quality flavors in just minutes. The tender steak is seasoned perfectly and cooked until golden brown, then tossed in a buttery garlic mixture that elevates the dish to new heights. It’s an easy yet impressive meal that’s perfect for weeknight dinners, special occasions, or any time you want to enjoy a delicious steak dish without the hassle. How can I customize my Garlic Butter Steak Bites? You can easily adapt Garlic Butter Steak Bites to your taste preferences! Swap the steak for chicken or shrimp for a delightful twist. Enhance the flavor with fresh herbs like thyme or rosemary. For an extra kick, consider adding red pepper flakes or even a splash of soy sauce for a Japanese-inspired flavor. The beauty of this dish lies in its versatility, allowing you to experiment with various ingredients while keeping the core deliciousness intact. Can Garlic Butter Steak Bites be made in advance? Yes, Garlic Butter Steak Bites can be made in advance, which is perfect for meal prep! Cook the steak bites and let them cool before storing them in an airtight container in the fridge for up to three days. You can reheat them on a low skillet over medium heat to preserve their flavor and tenderness. Just imagine having this delicious dish ready to go after a long day at work—talk about an effortless gourmet meal! What sides pair well with Garlic Butter Steak Bites? When it comes to sides, Garlic Butter Steak Bites can shine alongside various delicious accompaniments! Consider serving them with creamy mashed potatoes, roasted vegetables, or a crisp green salad for a balanced meal. For a more indulgent experience, you can’t go wrong with buttery garlic bread or even a bowl of pasta tossed with olive oil and herbs. These combinations will elevate your dining experience to
Easy Spinach Artichoke Dip Recipe for Quick Appetizers
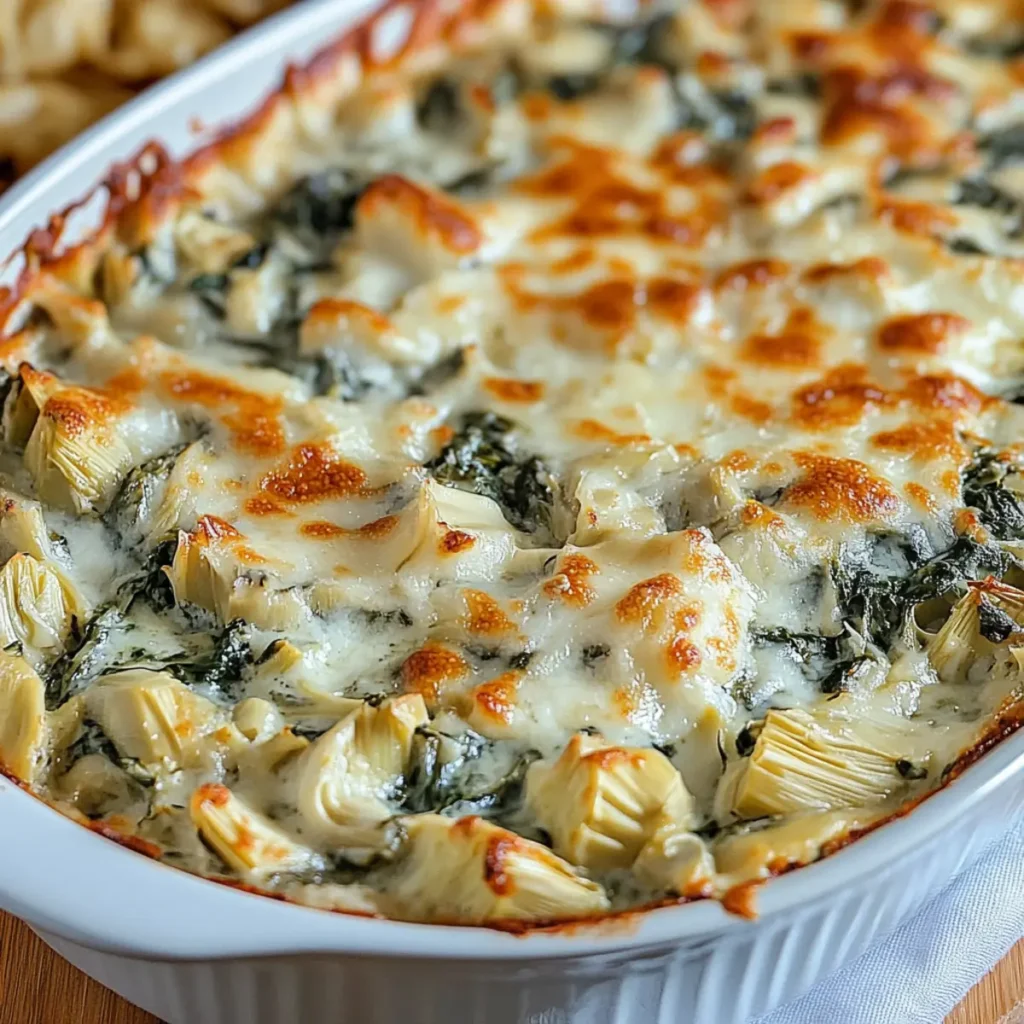
When it comes to the ultimate party appetizer, few dishes can compete with the creamy, cheesy delight of Spinach Artichoke Dip. Imagine sinking into a generous scoop of warm dip, where the velvety cream cheese harmonizes perfectly with the earthy spinaches and tangy artichoke hearts. The aroma wafts through your kitchen, promising a blissful tasting experience that could make even the most dedicated food snob nod in approval. Every time I make Spinach Artichoke Dip, I can’t help but recall a fun-filled night with friends, gathered around the table, competing over who could make the best dip (spoiler alert: we know who the real champion is). Whether it’s game day, a cozy movie night, or a potluck gathering, this Spinach Artichoke Dip definitely knows how to steal the show. Get ready for a flavor explosion that will have your guests begging for the recipe. Ingredients for Spinach Artichoke Dip Here’s what you’ll need to make this delicious Spinach Artichoke Dip: 1 cup fresh spinach – Choose vibrant green leaves to add a fresh flavor and a pop of color to your dip. 1 can (14 oz) artichoke hearts – Opt for the canned version; just make sure they’re drained to avoid excess moisture. 8 oz cream cheese – This should be softened at room temperature for easy mixing and a creamy texture. ½ cup sour cream – Adds a tangy twist to the dip and enhances its creaminess. ½ cup shredded Parmesan cheese – Use freshly grated Parmesan for an intense, nutty flavor. 1 tsp garlic powder – A must-have ingredient to infuse your dip with a delicious garlicky goodness. Salt and pepper to taste – Adjust these to enhance flavors, ensuring that all ingredients sing and dance together. How to Make Spinach Artichoke Dip Follow these simple steps to prepare this delicious Spinach Artichoke Dip: Step 1: Preheat Your Oven Start by preheating your oven to 350°F (175°C). It’s essential to have your oven warmed up while you prepare the ingredients to ensure even baking. Step 2: Mix the Creamy Base In a mixing bowl, combine the softened cream cheese, sour cream, and shredded Parmesan cheese. Use a hand mixer or a whisk to blend them into a smooth, velvety mixture that beckons you to dive in. Step 3: Fold in Spinach and Artichokes Next, gently fold in the chopped spinach and artichoke hearts until they’re fully coated by the creamy mixture. Take care not to over-mix, as you want those delectable pieces to hold their own in every bite. Step 4: Add Flavors Sprinkle in garlic powder, and season with salt and pepper. Mix well to ensure that every bite is packed with flavor. You can even taste a spoonful to see if it needs a little more oomph! Step 5: Transfer and Bake Carefully transfer the delightful mixture into a greased baking dish, smoothing the top for even baking. Place it in the oven and bake for 25-30 minutes until bubbling and perfectly golden brown on top. Step 6: Serve and Enjoy Once done, let it cool slightly—I know it’s hard to resist diving in, but nobody enjoys a blistered tongue. Serve with tortilla chips, veggie sticks, or even toasted baguette slices for a party of flavors. Get ready to fall in love with this Spinach Artichoke Dip—trust me, your taste buds will thank you! Enjoy the creamy goodness and the joyful gatherings it brings. Perfecting Spinach Artichoke Dip Cooking Process Start by preheating your oven, then mix the cream cheese, sour cream, and Parmesan until smooth. Fold in the spinach and artichokes, season, then bake until golden and bubbly for perfect results every time. Add Your Touch to Spinach Artichoke Dip Feel free to swap the cream cheese for Greek yogurt for a lighter option, or add a splash of hot sauce for a spicy kick. Toss in chopped sun-dried tomatoes or mozzarella for extra flavor and texture. Storing & Reheating Spinach Artichoke Dip Store any leftovers in an airtight container in the fridge for up to three days. Reheat in the oven at 350°F until warmed through for the best flavor and texture. Sharing this recipe always reminds me of the first time I made it for a family gathering. Everyone raved about it, and my aunt insisted I put it in the family cookbook, making me feel like a culinary rock star. FAQs About Spinach Artichoke Dip What is Spinach Artichoke Dip? Spinach artichoke dip is a creamy and flavorful appetizer made primarily with spinach, artichoke hearts, cream cheese, sour cream, and Parmesan cheese. It’s often baked until bubbling and golden, creating a delightful combination of rich textures. This versatile dish is perfect for serving at parties, game days, or family gatherings, where it can be enjoyed with tortilla chips, crackers, or fresh vegetables. It embodies a blend of savory and cheesy goodness that caters to a wide range of taste preferences. How can I customize my Spinach Artichoke Dip? Customizing your spinach artichoke dip is a breeze! You can easily swap out the cream cheese for Greek yogurt for a lighter version, or even add a splash of hot sauce or diced jalapeños for some extra heat. Think about mixing in sun-dried tomatoes or mozzarella cheese to enhance its flavor profile. You can also try different cheese blends like cheddar or feta for a unique twist, allowing for endless possibilities that fit your taste! Can I make Spinach Artichoke Dip ahead of time? Yes, preparing spinach artichoke dip in advance is simple and convenient. You can mix all the ingredients and store the mixture in an airtight container in the refrigerator for up to two days. When you’re ready to serve, simply transfer it to a baking dish and bake as directed. This makes it a fantastic option for entertaining, as you can focus on the fun part—enjoying your guests—while still impressing them with a delicious homemade dip. What can I serve with Spinach Artichoke Dip? There is a wide variety of
Delicious Cheesy Mashed Potato Puffs Recipe for a Fun Snack

The aroma of golden, crispy Cheesy Mashed Potato Puffs wafting through your kitchen can transform any ordinary day into a joyous celebration. These delightful puffs are an irresistible blend of creamy mashed potatoes and gooey cheese, bringing warmth and smiles to every gathering. Whether you’re preparing for a family dinner or a cozy night with friends, this recipe packs a punch of flavor and nostalgia. Picture this: you’re hosting a party, and everyone is eagerly snacking on appetizers. You casually present these Cheesy Mashed Potato Puffs, and suddenly, they’re gone in a flash! As everyone digs into the warm, cheesy goodness, memories of childhood comfort food flood back, creating an atmosphere of happiness and laughter. These puffs are more than just a side dish; they’re a reason to celebrate togetherness. Ingredients for Cheesy Mashed Potato Puffs Here’s what you’ll need to make this delicious Cheesy Mashed Potato Puffs: 2 cups creamy mashed potatoes – Make your own or use leftovers, but ensure they’re smooth for the best texture. 1 cup shredded cheddar cheese – Aged cheddar adds robust flavor, but feel free to use mild for a subtler taste. 1/2 cup shredded mozzarella cheese – This cheese gives a stretchy, gooey quality, elevating your puffs to comforting heights. 2 large eggs – These bind the mixture beautifully, ensuring your puffs hold their shape while baking. 1/4 cup all-purpose flour – This helps to keep your puffs from being too mushy and adds just the right texture. 1/4 cup chopped green onions – A pop of fresh flavor that brightens every bite of these cheesy delights. Salt and pepper to taste – Essential for bringing all the flavors together, so don’t skip this step! How to Make Cheesy Mashed Potato Puffs Follow these simple steps to prepare this delicious Cheesy Mashed Potato Puffs: Step 1: Preheat Your Oven Begin by preheating your oven to 400°F (200°C). Don’t forget to line a baking sheet with parchment paper to prevent sticking. This is essential for ensuring that your puffs are easy to remove once they’re crispy and golden. Step 2: Combine the Ingredients In a large mixing bowl, combine the creamy mashed potatoes, cheddar cheese, mozzarella cheese, eggs, flour, green onions, salt, and pepper. Mix everything together until it’s just combined. You want a homogenous mixture that will hold together nicely without being overworked. Step 3: Form the Puffs Using an ice cream scoop or your hands, shape the mixture into small balls — think golf ball size. Place them evenly on the prepared baking sheet, leaving a little space between each puff. This will allow them to bake to perfection, ensuring a nice crisp on all sides. Step 4: Bake to Perfection Pop your baking sheet into the preheated oven and bake for 20-25 minutes. You’re looking for that golden-brown color and a crisp exterior that makes your mouth water just thinking about it. Step 5: Cool and Serve Once they’re perfectly baked, let the Cheesy Mashed Potato Puffs cool slightly before serving. This short wait will help them firm up a bit, making them easier to handle—if you can resist the heavenly aroma wafting through your kitchen. Step 6: Enjoy! Serve warm and watch as your friends and family dive into these cheesy delights. They’re the perfect finger food for any occasion, bringing joy and comfort in every bite. These Cheesy Mashed Potato Puffs are not only delicious but also incredibly versatile. You can easily customize them by adding different herbs, spices, or even crispy bacon for a smoky twist. They work beautifully as an appetizer, side dish, or even a fun snack to enjoy while binge-watching your favorite show. As you enjoy your Cheesy Mashed Potato Puffs, take a moment to relish the satisfaction of creating something purely delightful from simple ingredients. Each puff is a little nugget of joy, perfect for bringing friends and family together around the table, or simply for indulging in some well-deserved comfort food. Now, go ahead and make those puffs and watch them vanish before your eyes! Perfecting Cheesy Mashed Potato Puffs Cooking Process Start with the mashed potatoes, making sure they’re light and fluffy. Preheat your oven to the right temperature while you mix together the ingredients. Form the puffs and make efficient use of your baking sheet for even cooking. Add Your Touch to Cheesy Mashed Potato Puffs Feel free to swap out cheddar for pepper jack for a spicy kick or add bacon bits for added flavor. You can even toss in some broccoli for a pop of color and greens. The possibilities are endless! Storing & Reheating Cheesy Mashed Potato Puffs Store leftover Cheesy Mashed Potato Puffs in an airtight container in the fridge for up to three days. Reheat in the oven at 350°F for about 10-15 minutes to restore that crispy exterior and warm, cheesy interior. Those moment when my friends devoured my Cheesy Mashed Potato Puffs faster than I could serve them are forever etched in my memory; we laughed and joked about how they disappeared quicker than my willpower to share. FAQs About Cheesy Mashed Potato Puffs What is Cheesy Mashed Potato Puffs? Cheesy Mashed Potato Puffs are delicious little bites made primarily from creamy mashed potatoes combined with a blend of cheese, eggs, and green onions. These savory snacks are baked until they’re perfectly golden and crispy on the outside, while remaining soft and cheesy on the inside. They serve as a delightful appetizer or side dish, perfect for parties, gatherings, or cozy dinners at home. Plus, their irresistible flavor and fun texture make them a hit among both kids and adults alike. How can I customize my Cheesy Mashed Potato Puffs? There are countless ways to make Cheesy Mashed Potato Puffs your own! For a spicier kick, consider using pepper jack cheese instead of cheddar. If you want to add some protein, crispy bacon bits or diced ham are fantastic options. You can also include chopped veggies like spinach or broccoli for an
Easy Jalapeño Popper Rolls Recipe for Perfect Party Appetizers

The moment you bite into a crispy, golden-brown Jalapeño Popper Roll, your taste buds will explode with delight. Imagine the creamy richness of softened cream cheese dancing with the zesty heat of fresh jalapeños, all enveloped in a flaky puff pastry that whispers sweet nothings to your palate. This is not just a snack; it’s an invitation to flavor paradise. As I recall the countless gatherings with friends where these little wonders stole the show, I can’t help but smile. Whether it’s game day or a cozy movie night, these Jalapeño Popper Rolls have become synonymous with enjoyable moments and unforgettable flavors. Perfect for any occasion, whether you’re hosting a crowd or simply craving a burst of deliciousness, these rolls are destined to impress. Ingredients for Jalapeño Popper Rolls Here’s what you’ll need to make this delicious Jalapeño Popper Rolls: 2 fresh jalapeños – Diced for a spicy kick that adds excitement to each bite. Adjust the quantity based on your heat tolerance. 8 oz cream cheese – Softened to bring creamy richness, ensuring smooth mixing with other ingredients. 1 cup shredded cheddar cheese – Adds a sharp, melty goodness to the filling that complements the jalapeños perfectly. 1 sheet puff pastry – Thawed and incredibly flaky, this pastry creates a delightful crunch around the creamy filling. 1 tsp garlic powder – Optional but recommended, it enhances flavor and adds a savory depth. Salt and pepper to taste – Essential seasonings to round out the flavors. 1 egg – Used for egg wash to give a beautiful golden sheen to the baked rolls. How to Make Jalapeño Popper Rolls Follow these simple steps to prepare this delicious Jalapeño Popper Rolls: Step 1: Preheat the Oven Preheat your oven to 400°F (200°C) and line a baking sheet with parchment paper to prevent your rolls from sticking. Step 2: Mix the Filling In a bowl, combine the softened cream cheese, shredded cheddar, diced jalapeños, garlic powder, salt, and pepper. Mix until the ingredients are smooth and well combined. Step 3: Prepare the Puff Pastry Roll out the thawed puff pastry on a lightly floured surface. Cut it into squares measuring approximately 4×4 inches, ready for your filling to shine. Step 4: Fill the Pastry Squares Place about one tablespoon of the creamy filling in the center of each square. Fold over the corners to seal the filling inside. This creates the perfect little pockets of goodness. Step 5: Brush with Egg Wash In a small bowl, beat the egg and brush it over the tops of the filled rolls. This step is crucial for achieving that beautiful golden color. Step 6: Bake the Rolls Place the rolls on the prepared baking sheet and bake for 15-20 minutes until they are puffed and golden brown. Let them cool slightly before serving for that ideal crispy texture. Serve these Jalapeño Popper Rolls warm, perhaps alongside a zesty dipping sauce or simply on their own for a snack that packs a flavorful punch. Enjoy the crunchy exterior combined with the creamy, spicy filling that will make you the hero of your next gathering! Perfecting Jalapeño Popper Rolls Cooking Process Start by prepping your ingredients. Dice the jalapeños, mix the cheeses, and roll out the puff pastry. Assemble the filling in the pastry squares before brushing on the egg wash, and bake them to perfection. This order ensures efficiency and a delightful crunch. Add Your Touch to Jalapeño Popper Rolls Feel free to customize your Jalapeño Popper Rolls! Try adding cooked bacon for a smoky flavor, substitute pepper jack cheese for extra heat, or toss in some corn for sweetness. Your creativity can make this dish uniquely yours. Storing & Reheating Jalapeño Popper Rolls To store leftover Jalapeño Popper Rolls, place them in an airtight container in the refrigerator for up to three days. To reheat, pop them back in a preheated oven at 350°F until warmed through to maintain their crispiness. The first time I made Jalapeño Popper Rolls, my friends devoured them faster than I expected. Their delighted faces made all the effort worthwhile, and they’ve been on the menu ever since! FAQs About Jalapeño Popper Rolls What is Jalapeño Popper Rolls? Jalapeño Popper Rolls are delightful appetizers that wrap spicy jalapeños and rich cheeses in flaky puff pastry. They combine the beloved flavors of jalapeño poppers in a fun, bite-sized form that’s perfect for parties and gatherings. Whether served as a starter or a game day snack, these rolls offer a crispy exterior and a creamy interior, making them a crowd favorite. Plus, they are super easy to make, using just a handful of ingredients you probably already have at home. How do I customize my Jalapeño Popper Rolls? Personalizing your Jalapeño Popper Rolls is not only fun but also lets you tailor the flavors to your liking. Consider adding cooked bacon for a smoky twist or using pepper jack cheese for added heat. You can even fold in sweet corn or roasted red peppers for a touch of sweetness and color. The beauty of this dish lies in its versatility—you can easily make it unique to your taste! Can I make Jalapeño Popper Rolls ahead of time? Absolutely! You can prepare your Jalapeño Popper Rolls in advance. Just assemble them and store them on a baking sheet lined with parchment paper. Cover with plastic wrap and refrigerate for up to 24 hours before baking. When you’re ready to serve, simply brush them with egg wash and bake directly from the fridge. They will still turn out crispy and delicious! What are the best ways to serve Jalapeño Popper Rolls? Jalapeño Popper Rolls are best served warm, straight from the oven for maximum crispiness. Pair them with a zesty dipping sauce like ranch, sour cream, or a spicy aioli for added flavor. These rolls shine at parties, game days, or even as a fun addition to a family dinner. Their flavor-packed profile and satisfying crunch make them a hit no matter the