
Delicious BBQ Meatballs Recipe: Easy Homemade Glaze included

The aroma of BBQ meatballs wafting through your kitchen can elevate any gathering, whether it’s a cozy family dinner or a lively summer barbecue. Picture this: juicy, tender meatballs coated in a sweet and smoky glaze, ready to be devoured one by one, preferably with a toothpick for impromptu snacking. These BBQ meatballs are not just food; they can ignite joy and spark memories, reminding you of that unforgettable backyard cookout when everyone couldn’t get enough. Now, let’s dive into the magic behind these BBQ meatballs. Each bite is a burst of flavor, balancing the richness of beef and the tanginess of BBQ sauce. And the best part? They’re so easy to whip up that you’ll be the star of your next potluck or family gathering without breaking a sweat. Let’s unlock the barbecue secret and bring some deliciousness to your table. Ingredients for BBQ Meatballs Here’s what you’ll need to make this delicious BBQ meatballs: 1 lb ground beef (80/20) – Perfect for juicy meatballs, this blend has enough fat to keep them moist without being greasy. ½ cup breadcrumbs – These help bind the meatballs and add texture. Feel free to use whole wheat for a healthier twist. 1 large egg – Acts as a binding agent, helping the meatballs hold their shape while baking. ¼ cup BBQ sauce (plus extra for glazing) – Provides a sweet and tangy flavor. Choose your favorite sauce for a personalized twist. 1 tsp garlic powder – This adds a savory depth to the meatballs without overpowering the BBQ flavor. 2 tbsp honey – Sweetens the glaze, balancing out the tanginess of the BBQ sauce for a delectable finish. 1 tsp Worcestershire sauce – Infuses a complex umami flavor that enhances the overall taste of the meatballs. How to Make BBQ Meatballs Follow these simple steps to prepare this delicious BBQ meatballs: Step 1: Preheat the Oven Preheat your oven to 400°F (200°C). This is the first step toward juicy, golden brown perfection. Step 2: Mix the Ingredients In a large bowl, mix the ground beef, breadcrumbs, egg, garlic powder, and half of the BBQ sauce until everything is well combined. You want this mixture to be cohesive but not overworked—treat it gently, and you’ll be rewarded with tender meatballs. Step 3: Shape the Meatballs Form the mixture into golf ball-sized meatballs. If you’re feeling fancy, you could make them slightly larger or smaller, but keep in mind that cooking time will vary. Place them on a parchment-lined baking sheet to keep cleanup easy. Step 4: Bake the Meatballs Bake the meatballs in the preheated oven for 20 minutes, or until they’re golden brown and cooked through. The smell will be overwhelmingly good, so resist the temptation to start snacking too early! Step 5: Glaze for Extra Flavor While the meatballs are baking, mix the remaining BBQ sauce with honey and Worcestershire sauce. After the first 20 minutes, brush this mixture generously onto the meatballs and return to the oven for an additional 5 minutes. This step creates a mouthwatering glaze that takes your BBQ meatballs over the top. Step 6: Serve and Enjoy Once the meatballs are finished, remove them from the oven and let them rest for a few minutes. Serve hot with optional toothpicks for easy snacking, or pair them with rice and veggies for a hearty meal. Now that you have your BBQ meatballs ready, consider the endless possibilities for enjoying them. They make a perfect appetizer for gatherings, and their flavor profile can easily adapt to your palate. Add some sriracha for a spicy kick or switch up the BBQ sauce for a different regional flair. As you savor each bite, remember the joy of sharing food with family and friends—it’s what life is all about. Enjoy your delicious, homemade BBQ meatballs! Perfecting BBQ Meatballs Cooking Process To cook your BBQ Meatballs perfectly, start by preheating your oven while you mix your ingredients. Shape the meatballs before popping them in the oven to bake, and finally, glaze with extra BBQ sauce for a sweet finish. Add Your Touch to BBQ Meatballs For a twist, try swapping ground beef for turkey or chicken. Add diced onions, bell peppers, or even jalapeños for a kick. Experiment with different BBQ sauces for a unique flavor profile. Storing & Reheating BBQ Meatballs Store your BBQ Meatballs in an airtight container in the fridge for up to three days. To reheat, simply place them in the microwave or oven until heated through, adding a splash of BBQ sauce to keep them moist. Sharing these BBQ Meatballs at a family gathering turned out to be a hit. Everyone was going back for seconds—my brother even asked for the recipe, which made my heart swell with pride! FAQs About BBQ Meatballs What are BBQ Meatballs? BBQ Meatballs are delicious, savory spheres made primarily of ground meat, breadcrumbs, and a mix of flavorful ingredients, all coated in a sweet and tangy barbecue sauce. They’re often baked and can be served as appetizers, main dishes, or as part of a hearty meal alongside rice and veggies. These meatballs are versatile enough to suit various tastes and occasions, providing an easy-to-make yet crowd-pleasing treat that everyone loves. How can I customize my BBQ Meatballs? You can easily customize your BBQ Meatballs to suit your palate. Consider swapping the ground beef for ground turkey or chicken for a healthier option. You can also add diced vegetables like onions, bell peppers, or even jalapeños for an extra kick. Experimenting with different flavors of BBQ sauce can alter the overall vibe of the dish, from smoky to sweet. The choice is yours! Can BBQ Meatballs be made ahead of time? Absolutely! BBQ Meatballs can be made ahead of time and stored in the fridge or freezer for later use. To prepare, simply prepare the meatballs, bake them, and let them cool. Then store them in an airtight container in the fridge for up to three days or freeze them
Savory Brown Butter Sweet Corn with Thyme: A Perfect Summer Side

Imagine that sweet, golden corn dancing in a pan of indulgent brown butter, subtly mingling with earthy thyme. The aroma wafting through your kitchen is enough to make anyone perk up and wander in. This is not just any side dish; this is Brown Butter Sweet Corn with Thyme, a glorious combination of flavors that screams summer goodness. It’s perfect for those sunny picnics, evening barbecues, or nestled next to your favorite grilled meats for a delightful explosion of taste. I remember the first time I tried brown butter sweet corn. It was at a charming little farmers’ market, where the vendor passionately touted the virtues of fresh produce. As I tasted the sweet kernels for the first time, I was transported back to childhood summers spent glistening with sweat and laughter. Each bite was a sweet reminder of simple joys and the magic of food that brings people together. Let your taste buds rejoice as we embark on this culinary journey, where every bite is a celebration of summer! Ingredients for Brown Butter Sweet Corn with Thyme Here’s what you’ll need to make this delicious Brown Butter Sweet Corn with Thyme: 4 ears fresh sweet corn – The stars of the dish; look for ears with bright, plump kernels for maximum sweetness. 4 tbsp unsalted butter – Opt for unsalted to control the seasoning and let the nutty flavor shine through. 3 sprigs fresh thyme – Fresh thyme adds a delightful earthiness; dried thyme can be used in a pinch, but fresh is preferred. Salt and pepper – Basic seasonings that enhance and elevate the natural sweetness of the corn. 1 tbsp lemon juice – A burst of citrus to brighten and balance the dish, cutting through the richness of the butter. How to Make Brown Butter Sweet Corn with Thyme Follow these simple steps to prepare this delicious Brown Butter Sweet Corn with Thyme: Step 1: Prepare the Corn Start by shucking the sweet corn. Remove the husks and silk threads to reveal those beautiful, sun-kissed kernels. A simple, satisfying process—just try not to make a mess; the bits of silk seem to have a mind of their own. Step 2: Brown the Butter In a medium skillet, melt the unsalted butter over medium heat. Watch closely as it starts to foam and turn golden brown, about 5 minutes. You’re not just melting butter; you’re creating nutty deliciousness. The key here is patience; don’t rush it! Step 3: Add the Corn Once the butter is nice and brown, toss in the fresh corn kernels. Stir them around, making sure each kernel gets coated in that heavenly brown butter. Ah, the smell in your kitchen will be enough to make anyone drool. Step 4: Seasoning Parade Season the mixture with salt and pepper, and add those fragrant thyme sprigs. Cook everything together for about 5-7 minutes until the corn turns tender and slightly caramelized. This is where the magic happens—your kitchen will smell like a dreamy summer day! Step 5: The Zesty Finale Remove the skillet from the heat and give your dish a zing with lemon juice. A little citrus goes a long way in brightening the flavors. Mix it all together and take a moment to admire your beautiful creation—you did it! Step 6: Serve and Enjoy Transfer the brown butter sweet corn to serving plates. It’s the perfect side for grilled meats, a summertime barbecue, or just a cozy dinner at home. Trust me, people might just fight over the last scoop! This Brown Butter Sweet Corn with Thyme is not only delicious but also versatile. Pair it with fish, chicken, or serve it alongside your favorite vegetarian dish. It works beautifully for everything, including meal prep; you can enjoy it throughout the week. Plus, with its vibrant colors and aromatic allure, your guests will be lining up for seconds. So, grab your apron, fire up that skillet, and prepare to make some unforgettable flavors explode on your palate! Perfecting Brown Butter Sweet Corn with Thyme Cooking Process Start by shucking the corn and prepping your ingredients. Melt the butter until golden brown, then add the corn and seasonings. Stir until the corn is tender and caramelized, ensuring a delicious flavor throughout. Add Your Touch to Brown Butter Sweet Corn with Thyme Feel free to swap the thyme for fresh basil or cilantro for a different twist. You can also toss in a pinch of red pepper flakes for heat or some chopped nuts for added crunch. Storing & Reheating Brown Butter Sweet Corn with Thyme Store leftovers in an airtight container in the fridge for up to three days. To reheat, simply warm in a skillet over medium heat, adding a splash of water or broth to retain moisture. When I first made Brown Butter Sweet Corn with Thyme for a summer barbecue, my friends couldn’t stop raving about it. One even asked if I’d quit my day job to become a professional chef! FAQs About Brown Butter Sweet Corn with Thyme What is Brown Butter Sweet Corn with Thyme? Brown Butter Sweet Corn with Thyme is a delightful side dish that showcases the natural sweetness of fresh corn, enhanced by the rich, nutty flavor of brown butter and the aromatic essence of thyme. This dish is not just simple to prepare; it transforms ordinary corn into a gourmet experience. Perfect for summer barbecues or weeknight dinners, it’s a crowd-pleaser that can elevate any meal. How do I store leftovers of Brown Butter Sweet Corn with Thyme? To store leftovers of Brown Butter Sweet Corn with Thyme, let the dish cool down and transfer it to an airtight container. You can keep it in the refrigerator for up to three days. When you’re ready to enjoy it again, simply reheat in a skillet over medium heat. Adding a splash of water or broth helps retain moisture and freshness, making it almost as good as when first served. Can I make Brown Butter Sweet Corn
Irresistible Butternut Squash Fritters Recipe for Any Occasion

Butternut squash fritters are more than just a dish; they’re a cozy hug on a plate, bursting with sweet, earthy flavor and a delightful crunch that calls out for a dip. Imagine taking a warm, golden fritter, crisp on the outside, and as you bite in, you’re greeted by the tender, slightly sweet flesh of butternut squash, all dancing together with the zing of green onions and a whisper of garlic. It’s comfort food at its finest, perfect for chilly evenings or served as a stunning appetizer at your next gathering. I remember the first time I tried making fritters. I was convinced I could impress my friends with my culinary prowess, but let’s just say, the smoke alarm had a different kind of ‘fritter’ experience that night. However, these Butternut Squash Fritters are a different story. They’re simple enough for a weeknight dinner and fancy enough to elevate any meal into a special occasion. With just a few steps, you’ll transform humble ingredients into a visually stunning and mouthwatering dish that will have everyone asking for seconds—and maybe even the secret recipe! Ingredients for Butternut Squash Fritters Here’s what you’ll need to make this delicious Butternut Squash Fritters: 1 medium butternut squash – about 2 cups when cooked; look for a squash that feels heavy for its size with smooth, unblemished skin. 1 cup all-purpose flour – substitute with gluten-free flour if necessary for a gluten-free version, helping bind the fritters together. 2 large eggs – large and fresh, they add moisture and act as a binding agent for the fritter mix. 4 green onions – finely chopped; these add a lovely mild onion flavor, elevating the dish. 1 tsp garlic powder – for a hint of garlicky goodness. Make sure it’s fresh for maximum flavor. 1 tsp salt – enhances all flavors and ensures the fritters are well-seasoned. ½ tsp black pepper – adds a subtle warmth and rounds out the taste beautifully. 2 tbsp olive oil – for frying; use a good quality oil for flavor and crispness. How to Make Butternut Squash Fritters Follow these simple steps to prepare this delicious Butternut Squash Fritters: Step 1: Roast the Butternut Squash Preheat your oven to 400°F (200°C) and halve the butternut squash. Scoop out the seeds, placing it cut-side down on a parchment-lined baking sheet. Roast for 30-40 minutes until fork-tender—your kitchen will smell like autumn! Step 2: Prepare the Fritter Mixture Once the squash is cool enough to handle, scoop the flesh into a mixing bowl. Add the flour, eggs, finely chopped green onions, garlic powder, salt, and pepper. Mix until everything is just combined—try not to over-mix, or your fritters might lose their fluff! Step 3: Heat the Oil In a skillet, heat the olive oil over medium heat until it shimmers invitingly. You want it hot enough so that when you drop in the batter, it sizzles but doesn’t splatter. Step 4: Fry the Fritters Using a spoon or a small ice cream scoop, drop heaping tablespoons of the batter into the skillet. Flatten them slightly with a spatula and fry for about 3-4 minutes on each side until they develop a golden-brown crust. Step 5: Drain the Fritters Transfer the cooked fritters to a plate lined with paper towels to drain excess oil. Repeat until all the batter is cooked—your kitchen will start to resemble a mini fine-dining establishment. Step 6: Serve and Enjoy Serve these beauties warm with your favorite dipping sauce. Sour cream or a tangy yogurt sauce can beautifully complement the flavors, but they’re also delightful all on their own. Get ready for compliments! That’s it! You’ve just made a scrumptious and satisfying batch of Butternut Squash Fritters that are perfect for any occasion. They are sure to be a hit whether as a wholesome snack, a side dish to accompany your main course, or even as the star of a festive appetizer platter. Enjoy the warm flavors, share the laughter, and don’t forget to save a few for yourself before they disappear! Perfecting Butternut Squash Fritters Cooking Process Start by roasting your butternut squash, as this allows for maximum flavor development. While it cools, gather your ingredients for the batter. Once prepped, fry the fritters in small batches for that heavenly golden crisp. Add Your Touch to Butternut Squash Fritters Feel free to swap out green onions for shallots or chives for a slight flavor twist. Add some shredded cheese for creaminess or even spices like cumin or chili flakes for an extra kick. Storing & Reheating Butternut Squash Fritters Store leftover fritters in an airtight container in the fridge for up to three days. Reheat in a skillet over medium heat to restore their wonderful crispiness. When I first made these Butternut Squash Fritters for my family, they couldn’t stop raving about them. My niece claimed they were the best thing since sliced bread—she might be slightly dramatic, but I won’t argue with her enthusiasm! FAQs About Butternut Squash Fritters What are Butternut Squash Fritters? Butternut Squash Fritters are delicious, savory pancakes made using roasted butternut squash, flour, eggs, and flavorful seasonings. These fritters are crispy on the outside and tender on the inside, combining a delightful sweetness from the squash with a kick from spices. They can be enjoyed as a snack, side dish, or appetizer, making them a versatile option for any meal. Whether served with a dipping sauce or simply enjoyed on their own, Butternut Squash Fritters are bound to impress. How do I make Butternut Squash Fritters crispy? To achieve the ideal crispy texture for your Butternut Squash Fritters, ensure you fry them in oil that is hot enough. Too low a temperature will lead to soggy fritters, while a shimmering, medium heat facilitates that perfect golden crust. Allowing the fritters to drain on paper towels after cooking helps remove excess oil. Using fresh ingredients and avoiding over-mixing the batter will also contribute to that coveted crispiness. Can I customize my Butternut Squash
Irresistibly Spicy Maple Brussels Sprouts Recipe for Crunchy Perfection
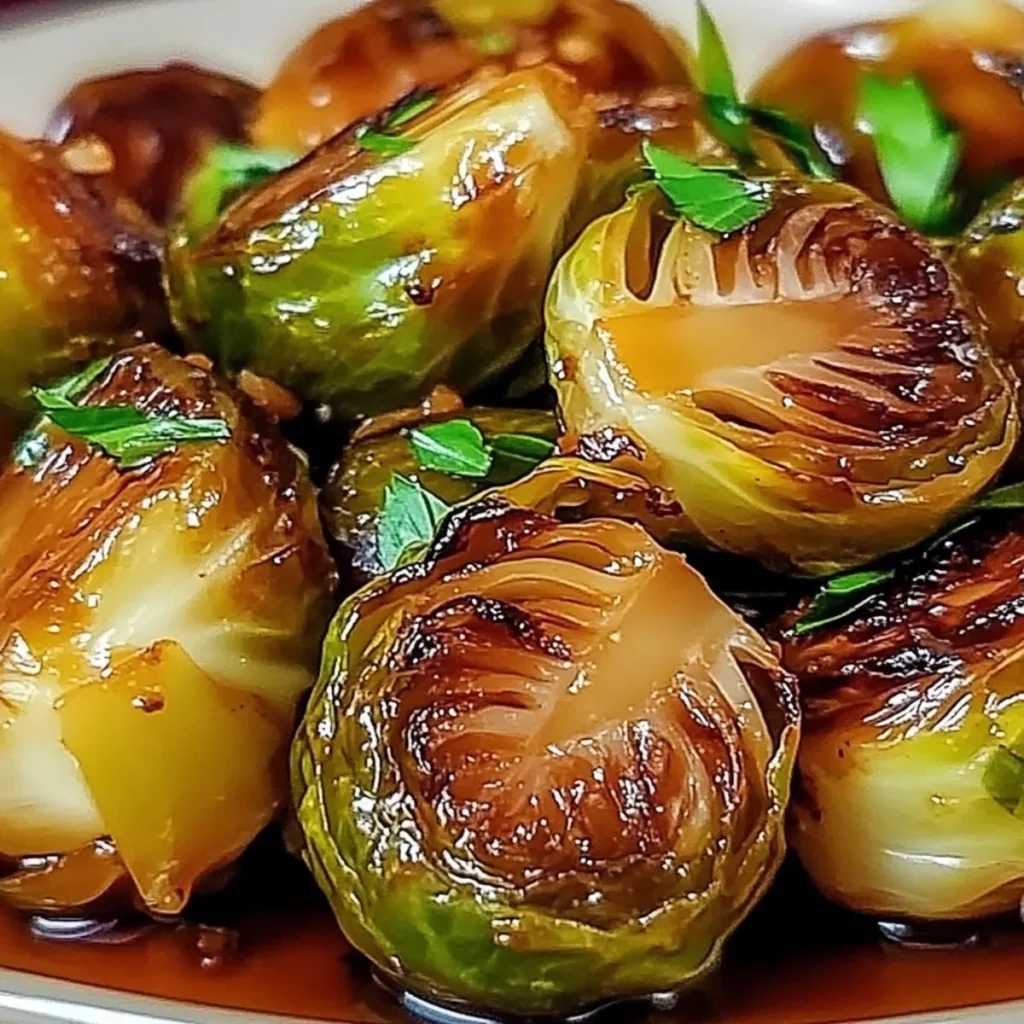
Imagine walking into your kitchen, the aromas of roasting vegetables filling the air, awakening your senses and beckoning you closer. Now, picture those golden-brown Brussels sprouts, glistening with a luscious maple glaze and a kick of spice. That’s right, we’re diving into the world of Spicy Maple Brussels Sprouts, a dish that’s sure to elevate your dinner game and impress anyone who lays eyes on it. Perfectly crispy and packed with flavor, these little green gems are not just a side; they’re a celebration on a plate. Let me tell you, I have a fond memory wrapped around these Brussels sprouts. It was a chilly fall evening when a close friend first introduced me to this delightful combination. We had gathered for a cozy dinner, and as the sprouts roasted, they filled the house with a warmth that rivaled even the most charming of hearths. It felt like a hug in food form. You’ll want to make these at your next gathering, whether it’s Thanksgiving or just a Tuesday night craving something new and exciting. Ingredients for Spicy Maple Brussels Sprouts Here’s what you’ll need to make this delicious Spicy Maple Brussels Sprouts: 1 lb Brussels sprouts – Look for firm sprouts that are vibrant green and small to medium in size for the best texture. 2 tbsp pure maple syrup – This will add a rich sweetness; avoid imitation syrup for the best flavor punch. 2 tbsp extra virgin olive oil – Use high-quality olive oil to enhance the overall taste of the dish. 1 tsp red pepper flakes – Adjust this according to your heat tolerance; they pack a flavorful punch. 1/2 tsp salt – Sea salt or kosher salt works best for seasoning evenly. 1/4 tsp black pepper – Freshly cracked black pepper adds a hint of warmth and depth. How to Make Spicy Maple Brussels Sprouts Follow these simple steps to prepare this delicious Spicy Maple Brussels Sprouts: Step 1: Preheat the Oven Preheat your oven to 425°F (220°C). This is the magical temperature where Brussels sprouts become crispy and golden. Step 2: Prepare the Brussels Sprouts Trim the ends of the Brussels sprouts and remove any yellow leaves. Cut them in half, ensuring even cooking. Step 3: Toss with Flavor In a large bowl, toss the halved sprouts with olive oil, salt, pepper, and red pepper flakes. Make sure they are evenly coated; consider it a mini workout! Step 4: Roast to Perfection Spread the seasoned sprouts on a baking sheet in a single layer. Roast them in the preheated oven for about 20-25 minutes until they are golden brown and crispy. Step 5: Add the Maple Glaze Once they’re all crispy, drizzle the warm Brussels sprouts with maple syrup. Toss gently to coat every morsel with that sweet goodness. Step 6: Serve and Enjoy Serve immediately while they’re hot and crispy for the best crunch! Feel free to garnish with a sprinkle of extra red pepper flakes or a drizzle of balsamic reduction if you’re feeling fancy. As you can see, making these Spicy Maple Brussels Sprouts is a straightforward process that’s well worth the effort. They’re perfect for Thanksgiving feasts, weeknight dinners, or as a tasty snack to munch on. The balance of sweet and spicy is something that even Brussels sprout skeptics can enjoy. Trust me, this is a dish you won’t want to miss. Enjoy your cooking adventure and prepare to amaze your family and friends with these delicious little bites of heaven! Perfecting Spicy Maple Brussels Sprouts Cooking Process Start by preheating your oven and prepping the Brussels sprouts while it warms up. Coat the sprouts with olive oil and spices, then roast until perfectly golden. Finally, drizzle with maple syrup right before serving for a sweet and spicy finish. Add Your Touch to Spicy Maple Brussels Sprouts Feel free to get creative by adding garlic for an extra kick, swapping maple syrup for honey, or tossing in some chopped pecans for crunch. You can also experiment with different spices like cumin or paprika to customize the flavor profile. Storing & Reheating Spicy Maple Brussels Sprouts Store any leftovers in an airtight container in the fridge for up to three days. To reheat, pop them in the oven at 350°F (175°C) for about 10 minutes to restore their crispy texture without sacrificing flavor. Sharing this recipe with friends, I was amazed by how quickly they devoured the sprouts, claiming they were the best they’d ever tasted. It turned a simple weeknight dinner into a fun, memorable feast! FAQs About Spicy Maple Brussels Sprouts What are Spicy Maple Brussels Sprouts? Spicy Maple Brussels Sprouts are a delicious side dish that combines the earthiness of Brussels sprouts with a sweet and spicy twist. This recipe features roasted Brussels sprouts, tossed in olive oil and seasonings, then drizzled with pure maple syrup. The result is a dish that is both crunchy and tender, balanced by the heat from red pepper flakes and the sweetness of maple syrup. Perfect for any occasion, these Brussels sprouts are sure to wow your family and friends! How do I store leftover Spicy Maple Brussels Sprouts? To keep your Spicy Maple Brussels Sprouts fresh, store any leftovers in an airtight container in the refrigerator. They can last up to three days. When approaching mealtime, simply reheat them in an oven preheated to 350°F (175°C) for around 10 minutes. This technique helps restore their crispy texture, ensuring that every bite retains its delightful crunch. Can I customize the heat in Spicy Maple Brussels Sprouts? Absolutely! If you prefer a milder version of Spicy Maple Brussels Sprouts, you can simply reduce the amount of red pepper flakes used. Alternatively, if you want to kick up the heat, feel free to add a bit more or incorporate other spicy elements like diced jalapeños or sriracha. The beauty of this recipe is its flexibility, allowing you to adjust the spice levels to your personal preference. What can I serve with Spicy
Delicious Pear and Gorgonzola Crostini Recipe in 20 Minutes

The moment you step into your kitchen with plans to create Pear and Gorgonzola Crostini, prepare to engage in a sensory delight. Picture this—a crispy baguette base, topped with the sweet creaminess of ripe pears and the bold tang of Gorgonzola, finished off with a drizzle of honey that makes your taste buds dance with joy. The aroma alone is enough to make anyone gravitate toward the kitchen, ready to tackle this deliciously uncomplicated appetizer. This dish isn’t just about amazing flavors; it’s laced with memories of gatherings and laughter, perhaps over a glass of wine, as guests marvel at your culinary prowess. It’s the perfect addition to a cozy game night, a fancy dinner party, or just a simple Tuesday evening when you want to treat yourself. You won’t believe how quickly you can whip up these little bites of joy! Ingredients for Pear and Gorgonzola Crostini Here’s what you’ll need to make this delicious Pear and Gorgonzola Crostini: 1 crusty baguette (10 oz) – A fresh baguette adds necessary crunch; it’s best if it’s slightly warm from the bakery. 2 ripe pears (about 12 oz) – Look for juicy pears that give slightly when pressed; they’ll add a delicious sweetness. 4 oz Gorgonzola cheese – This cheese’s robust flavor offers a delightful contrast to the sweetness of the pears. 2 tbsp honey – Sweet honey drizzled on top not only ties the flavors together but also adds a beautiful glaze. 2 tbsp extra virgin olive oil – This oil enhances the bread’s toasty goodness and helps to keep it from drying out in the oven. Fresh thyme (optional) – Add this herb for an aromatic touch; it complements the sweet and savory flavors beautifully. How to Make Pear and Gorgonzola Crostini Follow these simple steps to prepare this delicious Pear and Gorgonzola Crostini: Step 1: Preheat the Oven Set your oven to 400°F (200°C). While it warms up, line a baking sheet with parchment paper for easy cleanup. Step 2: Slice the Baguette Cut the baguette into half-inch rounds, placing them neatly on the baking sheet. This step is where your choice of a crusty baguette truly shines. Step 3: Drizzle the Olive Oil Generously drizzle the olive oil over your baguette slices, ensuring each piece is coated evenly. This will give your crostini that delicious golden crispiness. Step 4: Toast the Bread Place the baking sheet in the oven and let the bread toast for about 8-10 minutes. Keep an eye on it to prevent any culinary mishaps involving burnt edges. Step 5: Assemble Your Crostini Once the bread is perfectly toasted, let it cool slightly. Top each slice with a piece of pear and crumbled Gorgonzola cheese. Optionally, sprinkle some fresh thyme on top for that extra flair. Step 6: Drizzle with Honey and Serve Before serving, drizzle honey over the assembled crostini. The final touch brings all the flavors together, making your Pear and Gorgonzola Crostini irresistible. Transfer to a platter and watch as guests swoon over your creation! Now that you’re set to impress, remember that the combinations of sweet and savory hits the high notes beautifully in this dish, so don’t be surprised when everyone asks for your secret recipe. Enjoy every single bite, and don’t forget to savor the process! Perfecting Pear and Gorgonzola Crostini Cooking Process To achieve the best results, start by preheating your oven and preparing the baguette slices first. Toast them to golden perfection while simultaneously slicing the pears and crumbling the Gorgonzola. This sequence keeps the work efficient and the flavors fresh. Add Your Touch to Pear and Gorgonzola Crostini Feel free to customize your Pear and Gorgonzola Crostini by swapping in different cheeses like feta or goat cheese. Consider adding a sprinkle of walnuts for extra crunch or a drizzle of balsamic glaze for a tangy twist that elevates the dish. Storing & Reheating Pear and Gorgonzola Crostini To store your Pear and Gorgonzola Crostini, keep the components separate in airtight containers. For reheating, warm the toasts in the oven for a few minutes to regain their crispiness before topping with cheese and pears again. Creating Pear and Gorgonzola Crostini can remind me of that dinner party I hosted where everyone raved about how fancy the dish looked, and kids insisted it was “the best pizza” they’ve ever had. It’s moments like these that truly make cooking fun and rewarding. FAQs About Pear and Gorgonzola Crostini What is Pear and Gorgonzola Crostini? Pear and Gorgonzola Crostini is a delightful appetizer that features toasted baguette slices topped with ripe pear, creamy Gorgonzola cheese, and a drizzle of honey. The combination of sweet and savory flavors creates a unique, mouthwatering experience that’s perfect for any gathering. This dish showcases a beautiful balance of textures, from the crunchy bread to the soft cheese and tender pears. It’s not only easy to make but also visually stunning, making it a popular choice for parties and special occasions. How do I customize Pear and Gorgonzola Crostini? Customizing Pear and Gorgonzola Crostini is easy and fun! Consider experimenting with different types of cheese, such as feta, goat cheese, or even blue cheese for a stronger flavor. You can also add crunchy elements like toasted walnuts or sliced almonds for extra texture. To enhance the sweetness, try drizzling balsamic glaze instead of honey or adding a pinch of cinnamon to the pears. These variations can elevate your Crostini and impress your guests even more! How should I store leftover Pear and Gorgonzola Crostini? To store leftover Pear and Gorgonzola Crostini, it’s best to keep the components separate. Place the toasted baguette slices in an airtight container, and store the pear slices and Gorgonzola cheese in separate containers in the fridge. This keeps the bread from becoming soggy. When you’re ready to enjoy them again, reheat the crostini in the oven to restore their crispiness and then top them with fresh ingredients to maintain the delicious flavors. Can I use different types of
Delicious Roasted Onion and Garlic Dip Perfect for Any Party
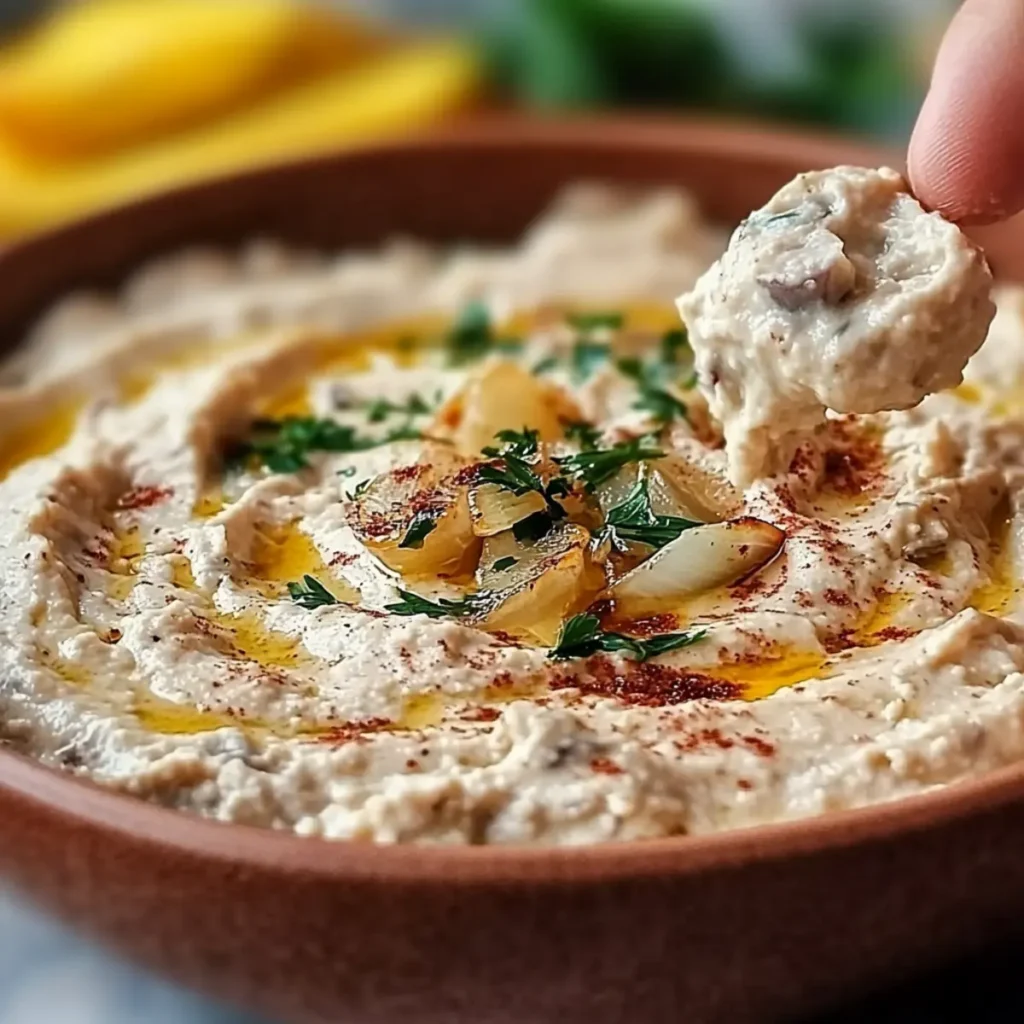
Imagine walking into a room filled with the irresistible aroma of caramelized onions mingling with the rich scent of roasted garlic. This Roasted Onion and Garlic Dip is not just a treat for your taste buds; it’s a warm embrace for all your senses, bringing a cozy, inviting atmosphere that’s perfect for gatherings. It’s the flavor experience you didn’t know you were missing, a dip that promises to elevate your snacking game to fabulous heights. Now, let me take you down memory lane. The first time I whisked this dip into existence was at a friend’s potluck. Everyone was bringing their A-game, but when I unveiled this creamy, dreamy dip, it stole the spotlight. Just picture a bowl brimming with golden roasted goodness, paired with crispy pita chips and vibrant veggies. It felt like the culinary equivalent of fireworks on the Fourth of July. Whether it’s a casual get-together, game night, or holiday party, having this dip on the table guarantees happy faces and empty bowls. Ingredients for Roasted Onion and Garlic Dip Here’s what you’ll need to make this delicious Roasted Onion and Garlic Dip: 2 medium yellow onions – Choose onions that feel heavy for their size, with no soft spots, for the sweetest flavor. 1 head of garlic – Go for a firm bulb; the fresher, the better to get that glorious roasted garlic taste. 8 oz cream cheese – Softened cream cheese gives this dip its creamy, smooth texture, making it extra indulgent. 1 cup sour cream – Adds a tangy flavor that balances the richness of cream cheese perfectly. 2 tbsp extra virgin olive oil – A splash of high-quality olive oil enhances the roasting process, adding depth to the flavors. Salt and pepper to taste – Essential for bringing all the flavors together; adjust to your liking. How to Make Roasted Onion and Garlic Dip Follow these simple steps to prepare this delicious Roasted Onion and Garlic Dip: Step 1: Preheat the Oven Preheat your oven to 400°F (200°C). This high heat is crucial for caramelizing the onions and roasting the garlic to perfection. Step 2: Prepare the Onions Slice the onions into thin wedges and lay them out on a baking sheet. Drizzle with olive oil, sprinkle generous amounts of salt and pepper, and toss to ensure an even coating. Step 3: Roast the Onions Roast the onions for 25-30 minutes until they turn a beautiful golden brown. Don’t forget to toss them halfway through! About 15 minutes in, add the whole garlic cloves to roast alongside the onions, allowing their flavors to meld beautifully. Step 4: Blend the Ingredients Once roasted, let the onions and garlic cool for a few moments. Then, transfer them to a food processor. Add in the softened cream cheese, sour cream, and any remaining olive oil you have left on the baking sheet. Step 5: Blend Until Smooth Blend the mixture until it reaches a smooth, creamy texture. Stop to taste and adjust the seasoning with extra salt and pepper if needed – the last step is crucial for flavor! Step 6: Serve and Enjoy Transfer your dip to a serving bowl and get those crispy pita chips and fresh veggies ready. Dip into this creamy goodness and watch everyone’s faces light up with delight! This Roasted Onion and Garlic Dip is not just a recipe; it’s a flavor-packed adventure waiting at your next gathering. The creamy, roasted goodness combined with crispy chips or crunchy veggies makes every bite an absolute pleasure. Trust me; your friends will be begging for the recipe! As you prepare this glorious dip, just remember—food is best enjoyed in good company, so don’t be shy about sharing the joy (and the dip) with others. As you watch the bowl empty and hear the laughter of friends, you’ll know you’ve created not just a snack but a memory. Enjoy! Perfecting Roasted Onion and Garlic Dip Cooking Process Start by preheating your oven, then prep the onions and garlic while it warms up. Roast them until golden brown, allowing those flavorful aromas to fill your kitchen. Blend the roasted goodness with cream cheese and sour cream for a dip that’s silky and rich. Add Your Touch to Roasted Onion and Garlic Dip Feel free to swap the cream cheese for Greek yogurt for a lighter option, or boost the flavor with herbs like thyme or rosemary. You can also add a sprinkle of feta for a tangy twist or some crushed red pepper flakes if you’re feeling spicy. Storing & Reheating Roasted Onion and Garlic Dip Store any leftovers in an airtight container in the fridge for up to five days. To reheat, simply microwave it in 30-second intervals, stirring in between, until it’s warm and inviting again. Sharing this dip at a family gathering left everyone taking second helpings and asking for the recipe. The joy on their faces as they dipped into creamy goodness reminded me just how powerful sharing food can be. FAQs About Roasted Onion and Garlic Dip What is Roasted Onion and Garlic Dip? Roasted Onion and Garlic Dip is a creamy and flavorful appetizer made from roasted yellow onions and garlic blended with cream cheese and sour cream. This luscious dip is perfect for parties or casual get-togethers, offering a sweet and savory flavor that tantalizes the taste buds. Roasting the onions and garlic brings out their natural sweetness, while the creaminess of the cheese adds a rich texture. It’s an incredibly versatile dish that pairs beautifully with fresh veggies, pita chips, or even spread on sandwiches. How do I store Roasted Onion and Garlic Dip? To keep your Roasted Onion and Garlic Dip fresh, store any leftovers in an airtight container in the refrigerator. It can last for up to five days. When you’re ready to enjoy it again, simply reheat it in the microwave for about 30 seconds at a time, stirring between intervals until it reaches your desired temperature. Alternatively, you can savor it
Delicious Caramelized Onion Jam Crostini Recipe for Entertaining
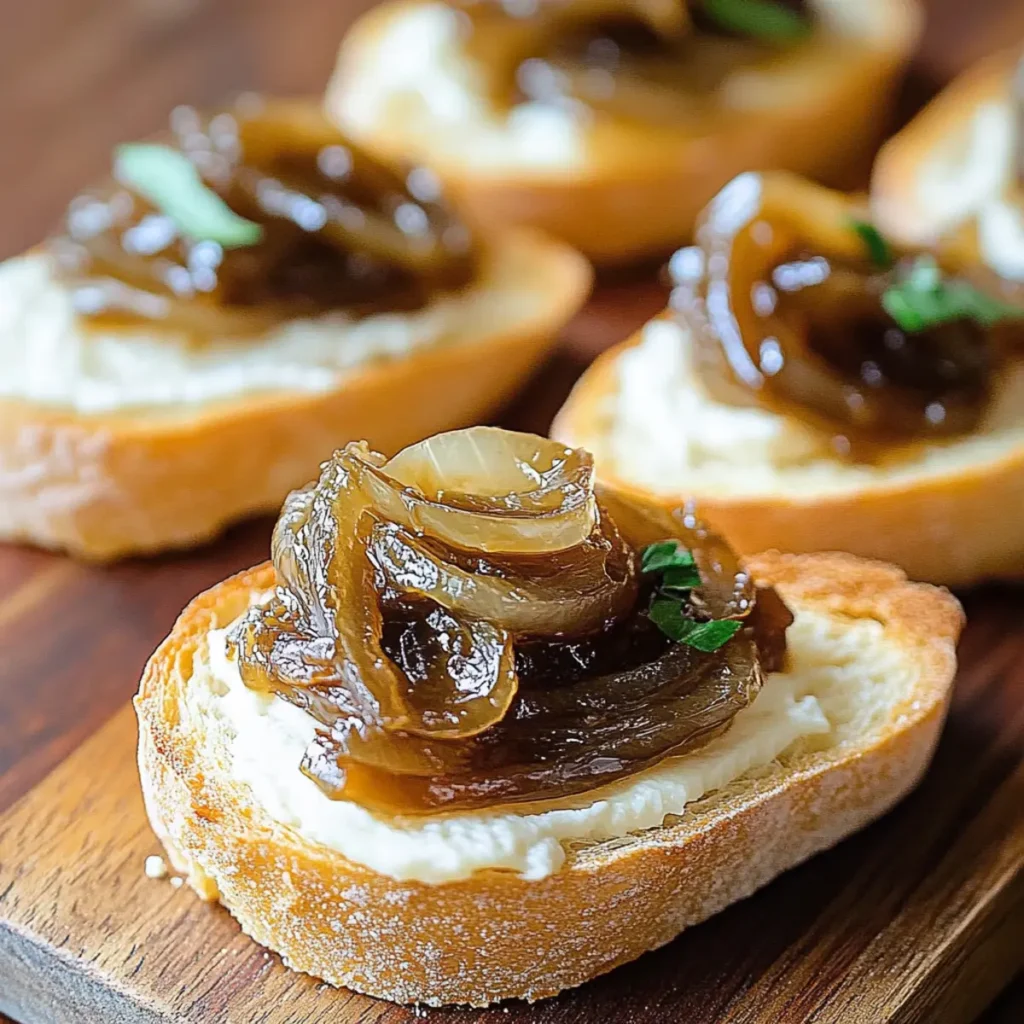
Imagine the aroma wafting through your kitchen as sweet onions caramelize into a luscious, golden jam, perfectly poised to grace a crisp baguette. This Caramelized Onion Jam Crostini is not just an appetizer; it’s a culinary symphony that sings of comfort and elegance, while also promising a delightful crunch with every bite. Perfect for your next gathering or a cozy night in, this recipe brings warmth, joy, and incredible flavor to the table. I remember the first time I served this dish, the reaction was priceless—friends delighting over the rich taste, all while trying to figure out how on Earth I turned humble onions into gourmet magic. With a promise of savory goodness and an inviting presentation, this dish is destined to be a favorite at any event. Ingredients for Caramelized Onion Jam Crostini Here’s what you’ll need to make this delicious Caramelized Onion Jam Crostini: 1 French baguette – Slice into 16 half-inch pieces for the perfect crunchy base. 3 large sweet onions – Use sweet onions for their rich flavor that caramelizes beautifully. 2 tbsp extra virgin olive oil – Enhances the flavor of the onions; save some for drizzling. 2 tbsp balsamic vinegar – Adds a tangy sweetness that complements the caramelized onions. 2 sprigs fresh thyme – Gives a fresh herbaceous note that rounds out the flavors beautifully. How to Make Caramelized Onion Jam Crostini Follow these simple steps to prepare this delicious Caramelized Onion Jam Crostini: Step 1: Preheat Your Oven Preheat your oven to 400°F (200°C). This is crucial for achieving that perfect golden-brown crunch on your baguette slices. Step 2: Prepare the Baguette Arrange the baguette slices on a baking sheet, brushing both sides generously with olive oil. Bake for 8-10 minutes until they’re wonderfully golden brown. Take a moment to enjoy that baking aroma. Step 3: Sauté the Onions In a skillet, heat 1 tbsp of olive oil over medium heat. Add in your thinly sliced onions and sauté for 20-30 minutes, stirring occasionally, until they are soft and beautifully caramelized—this is where the magic happens. Step 4: Season Your Jam Once the onions have reached that dreamy, golden stage, stir in the balsamic vinegar and chopped fresh thyme. Let it simmer for another two minutes, allowing the flavors to meld together. Step 5: Assemble the Crostini Spread the caramelized onion jam generously over each toasted baguette slice. Make sure every bit of that sweet goodness makes it onto each piece; your taste buds will thank you! Step 6: Serve and Enjoy Serve warm or at room temperature. You can even drizzle a bit more olive oil on top if you’re feeling fancy. These crostini are perfect for sharing or for devouring solo with a good glass of wine. This Caramelized Onion Jam Crostini is bound to be a hit, whether you’re hosting a gathering or just indulging in some comfort food. Not only is it simple to prepare, but it’s also bursting with flavor that will leave everyone asking for more. So grab your apron, channel your inner chef, and dive into creating this crowd-pleaser! Your taste buds are in for a treat. Perfecting Caramelized Onion Jam Crostini Cooking Process Start by preheating the oven while you prepare your onions. Sauté the onions first for that glorious caramelized depth, then toast your baguette slices to perfection. Combine the two masterpieces and marvel at your efficiency. Add Your Touch to Caramelized Onion Jam Crostini Feel free to swap sweet onions with shallots for a more delicate flavor or add some crumbled goat cheese on top for a creamy contrast. Spice things up by scattering red pepper flakes or garnishing with fresh arugula! Storing & Reheating Caramelized Onion Jam Crostini Store leftover Caramelized Onion Jam Crostini in an airtight container in the fridge for up to three days. To reheat, bake at 350°F for about 5-7 minutes, restoring that delightful crunch. Sometimes I whip up a batch of Caramelized Onion Jam Crostini for friends, and the moment they sink their teeth into that crispy bread smothered in sweet onion goodness, their eyes light up. It makes my heart sing every time! FAQs About Caramelized Onion Jam Crostini What is Caramelized Onion Jam Crostini? Caramelized Onion Jam Crostini is a delightful appetizer featuring crispy, toasted baguette slices topped with a luscious, sweet jam-like spread made from slow-cooked onions. The caramelization process transforms the onions into a golden-brown medley of flavor that balances beautifully with the crunch of the bread. The addition of balsamic vinegar and fresh thyme elevates the taste profile, giving it a gourmet touch. This dish is perfect for entertaining, casual gatherings, or a cozy night in, turning any occasion into something special. How do I make Caramelized Onion Jam Crostini? To make Caramelized Onion Jam Crostini, start by slicing a French baguette and toasting it until golden brown. In a skillet, cook thinly sliced sweet onions with olive oil over medium heat, stirring until they caramelize to a deep golden color. Then, add balsamic vinegar and fresh thyme to enhance the flavor. Spread this delectable onion jam generously onto the toasted baguette slices for a quick yet impressive appetizer that your guests will love. Can I customize my Caramelized Onion Jam Crostini? Absolutely! While the basic recipe is a winner on its own, you can customize your Caramelized Onion Jam Crostini to cater to your taste buds. Consider adding toppings like crumbled goat cheese or creamy ricotta for richness. You can also sprinkle some chili flakes for a spicy kick or fresh arugula for a peppery contrast. Explore your creativity by incorporating seasonal ingredients to make this dish uniquely yours! How should I store leftovers of Caramelized Onion Jam Crostini? If you have any leftovers of your Caramelized Onion Jam Crostini, don’t worry! Simply place them in an airtight container and store them in the refrigerator for up to three days. To enjoy the crunchy texture again, preheat your oven and reheat the crostini at 350°F for about 5-7 minutes.
Delicious Caramelized Onion and Fig Flatbread Recipe to Enjoy

Imagine sinking your teeth into a crispy, golden flatbread topped with sweet, caramelized onions and fresh figs. The moment you savor that first bite, you’re escorted to flavor town, where the sweet and savory dance together in perfect harmony. This Caramelized Onion and Fig Flatbread will have your taste buds singing, and no need to worry about kitchen disasters—it’s as approachable as your favorite pair of sweatpants after a long day. You’ll want to gather your loved ones around to experience this goodness together. Now, close your eyes and think of the aromas wafting through your kitchen as you bake this masterpiece. Picture it served fresh from the oven at your next gathering, wedding anniversary, or family game night. The combination of sweet figs, tangy goat cheese, and those beautifully caramelized onions creates an experience that will have everyone raving about your culinary skills. You’re about to be the hero of the evening, all thanks to this enchanting dish! Ingredients for Caramelized Onion and Fig Flatbread Here’s what you’ll need to make this delicious Caramelized Onion and Fig Flatbread: 1 large flatbread – You can use store-bought for convenience or make your own if you’re feeling adventurous. 2 medium sweet onions – Look for onions that feel firm. Sweet onions will add an amazing depth of flavor once caramelized. 4 fresh figs – Ripe but firm figs work best; their natural sweetness will shine through in this dish. 2 tablespoons extra virgin olive oil – Use high-quality olive oil for the best flavor. It helps to caramelize those onions beautifully. 1 tablespoon balsamic vinegar – This adds a tangy kick that complements the sweetness of the figs. 4 ounces goat cheese – The creaminess of goat cheese provides a delightful contrast to the flatbread. A perfect match for the figs and onions. 1 teaspoon fresh thyme leaves – Fresh thyme brings an aromatic hint that elevates the dish and makes your kitchen smell divine. How to Make Caramelized Onion and Fig Flatbread Follow these simple steps to prepare this delicious Caramelized Onion and Fig Flatbread: Step 1: Preheat your oven Set your oven to 400°F (200°C). If you’re using store-bought flatbread, line a baking sheet with parchment paper to avoid any sticky situations. Step 2: Caramelize the onions In a skillet over medium heat, add 1 tablespoon of olive oil. Toss in the thinly sliced sweet onions. Cook them gently, stirring occasionally for about 15 to 20 minutes, until they turn golden brown and jam-packed with flavor. Step 3: Prepare the figs While those onions are transforming into caramelized goodness, slice the fresh figs in half lengthwise. Their luscious sweetness will serve as the perfect partner for the savory onions. Step 4: Build your flatbread Spread the remaining olive oil over the flatbread evenly. Layer the caramelized onions and figs across the flatbread, making sure to spread them out so every bite has a bit of everything. Crumble the goat cheese over the top and sprinkle fresh thyme leaves for that aromatic punch. Step 5: Bake to perfection Place the flatbread in the preheated oven. Bake for about 10-12 minutes until the flatbread is warmed through and slightly bubbly. Your kitchen will start to smell incredible—prepare for some hungry eyes! Step 6: Drizzle and serve After you pull that beauty from the oven, drizzle it with a touch of balsamic vinegar to enhance the flavors. Slice it up and serve it hot, preferably while basking in the glory of everyone asking for seconds! Now that you’ve mastered this delightful Caramelized Onion and Fig Flatbread, get ready to impress your friends, family, and even that one neighbor who always brings over questionable desserts. Embrace the simplicity of the ingredients, enjoy the symphony of flavors, and before you know it, you’ll find yourself spinning tales about how this flatbread will be the star of every event from here on out. Happy cooking! Perfecting Caramelized Onion and Fig Flatbread Cooking Process Begin by caramelizing the onions first to develop rich flavors. While they cook, prepare the figs and flatten your bread. Once the onions are ready, add everything to the flatbread and pop it in the oven for the best results. Add Your Touch to Caramelized Onion and Fig Flatbread Feel free to swap goat cheese with feta or blue cheese for a bolder taste. You can also add a drizzle of honey for extra sweetness or experiment with different herbs like rosemary for new flavor profiles. Storing & Reheating Caramelized Onion and Fig Flatbread Store any leftovers in an airtight container in the fridge for up to three days. To reheat, pop it back in the oven at 350°F (175°C) for about 10 minutes to restore its crispiness. The first time I made this Caramelized Onion and Fig Flatbread, my friends couldn’t stop raving about it—they even accused me of ordering it from a fancy restaurant! FAQs About Caramelized Onion and Fig Flatbread What is Caramelized Onion and Fig Flatbread? Caramelized Onion and Fig Flatbread is a delightful dish that marries the sweetness of caramelized onions with the rich, fruity flavor of figs. This recipe features a crispy flatbread base topped with crumbled goat cheese and fresh thyme, transforming these simple ingredients into a gourmet experience. It’s perfect for a quick weeknight dinner or an impressive appetizer for entertaining friends and family. How do you store leftovers of Caramelized Onion and Fig Flatbread? To keep your Caramelized Onion and Fig Flatbread fresh, store any leftovers in an airtight container in the refrigerator. It will maintain its quality for up to three days. If you’re ready to enjoy it again, simply reheat in a preheated oven at 350°F (175°C) for around ten minutes. This restores the crispiness while warming up the flavors. Can I customize the toppings on my Caramelized Onion and Fig Flatbread? Absolutely! One of the joys of making your own Caramelized Onion and Fig Flatbread is the ability to customize it. Swap out goat cheese for feta or blue
Delicious Sweet Potato Fritters with Chili Yogurt Dip Recipe

There’s a certain magic that happens when sweet potatoes get their moment in the spotlight, each magical fritter almost singing with flavor and comfort. Imagine biting into a golden-brown fritter that’s crispy on the outside and tender on the inside, seasoned with a hint of cumin and brightened by fresh green onions. Pair them with a creamy chili yogurt dip, and you’ll be dancing around the kitchen to their delectable tune before you know it. Growing up, my family didn’t shy away from a little creativity in the kitchen, and sweet potato fritters were one of those delightful experiments that turned into a household favorite. It’s a cherished memory that takes me back to joyful family dinners where I was entrusted to flip the fritters, only to break a few along the way. But those crispy edges dipped in a tangy yogurt sauce made every kitchen mishap worth it. Whether you’re gearing up for game night, hosting a cozy dinner party, or just looking to treat yourself after a long day, these Sweet Potato Fritters with Chili Yogurt are the perfect addition to your table. Ingredients for Sweet Potato Fritters with Chili Yogurt Here’s what you’ll need to make this delicious Sweet Potato Fritters with Chili Yogurt: 3 medium sweet potatoes – Grated; look for firm, smooth potatoes to get the best flavor and texture. 1 cup all-purpose flour – This helps bind the fritters together and creates a crispy exterior. 2 large eggs – These act as a binder, helping the fritters hold their shape during cooking. ½ cup green onions – Freshly chopped; they add a nice oniony flavor that complements the sweetness of the potatoes. 1 tsp ground cumin – This adds warmth and a subtle, earthy flavor to the fritters. Salt and pepper – Adjust these to your taste to enhance the overall flavors. 1 cup plain Greek yogurt – This creamy base serves as a perfect dip that adds richness and tang. 1 tbsp chili powder – Mix this into the yogurt for a spicy kick that balances out the sweetness of the fritters. How to Make Sweet Potato Fritters with Chili Yogurt Follow these simple steps to prepare this delicious Sweet Potato Fritters with Chili Yogurt: Step 1: Prepare the Sweet Potatoes Peel and grate the sweet potatoes using a box grater or food processor. Place the grated sweet potatoes in a clean kitchen towel and squeeze out excess moisture to prevent sogginess. Step 2: Mix the Ingredients In a large bowl, combine the grated sweet potatoes, flour, green onions, eggs, cumin, salt, and pepper. Mix everything until well combined, ensuring each ingredient is evenly distributed. Step 3: Heat the Oil Heat about 2 tablespoons of oil in a skillet over medium heat. You want the oil hot enough that a small drop of batter sizzles when added, creating that perfect golden crust. Step 4: Form and Cook the Fritters Using about 2 tablespoons of the mixture for each fritter, drop it into the skillet, flattening it slightly with the back of a spatula. Cook for around 3 minutes on each side, until they achieve a lovely golden color. Step 5: Make the Chili Yogurt Dip While the fritters are finishing up, grab a separate bowl and mix the Greek yogurt and chili powder until smooth. Taste and adjust the spice level to your liking; feel free to add more chili if you want a little extra heat. Step 6: Serve and Enjoy Transfer the warm fritters to a serving plate and pair them with the chili yogurt dip. Dive in while they’re still warm for the best flavor experience! Now you’re all set to impress your family and friends with these incredible Sweet Potato Fritters with Chili Yogurt! They’re not just easy to make; they’re bursting with flavor and sure to be a hit at any gathering. Enjoy! Perfecting Sweet Potato Fritters with Chili Yogurt Cooking Process Start by grating sweet potatoes and squeezing out moisture. Mix all ingredients, then heat oil in a skillet. Cooking in batches ensures they achieve golden perfection without overcrowding the pan for even cooking and crispy edges. Add Your Touch to Sweet Potato Fritters with Chili Yogurt Feel free to customize these fritters by adding shredded carrots, minced garlic, or even crumbled feta for a tangy twist. Swap the chili powder for smoked paprika if you desire a hint of smokiness instead. Storing & Reheating Sweet Potato Fritters with Chili Yogurt To store leftovers, place fritters in an airtight container in the refrigerator for up to three days. Reheat in a skillet over medium heat for a few minutes to restore their crispiness. When I first served these fritters at a family gathering, the way everyone devoured them left me both shocked and delighted. Someone even asked for the recipe, which made my day! FAQs About Sweet Potato Fritters with Chili Yogurt What is Sweet Potato Fritters with Chili Yogurt? Sweet Potato Fritters with Chili Yogurt is a delightful dish made from grated sweet potatoes, eggs, flour, and spices, all brought together to create crispy, tender fritters. These mouthwatering morsels are paired with a creamy chili yogurt dip that adds a deliciously zesty kick. They are ideal as an appetizer, snack, or even a main dish, making them versatile for dinner parties or family meals. Packed with flavor and wholesome ingredients, they’re a great way to enjoy the health benefits of sweet potatoes in a fun and exciting way. How do I make Sweet Potato Fritters with Chili Yogurt? To make Sweet Potato Fritters with Chili Yogurt, start by peeling and grating three medium sweet potatoes. Squeeze out any excess moisture and then mix them with flour, eggs, chopped green onions, cumin, salt, and pepper. Heat oil in a skillet and scoop spoonfuls of the mixture, flattening them for frying until golden brown. For the chili yogurt dip, simply combine Greek yogurt with chili powder in a bowl. Serve the warm fritters alongside the dip and
Sweet and Spicy Roasted Chickpeas Recipe for a Crunchy Snack
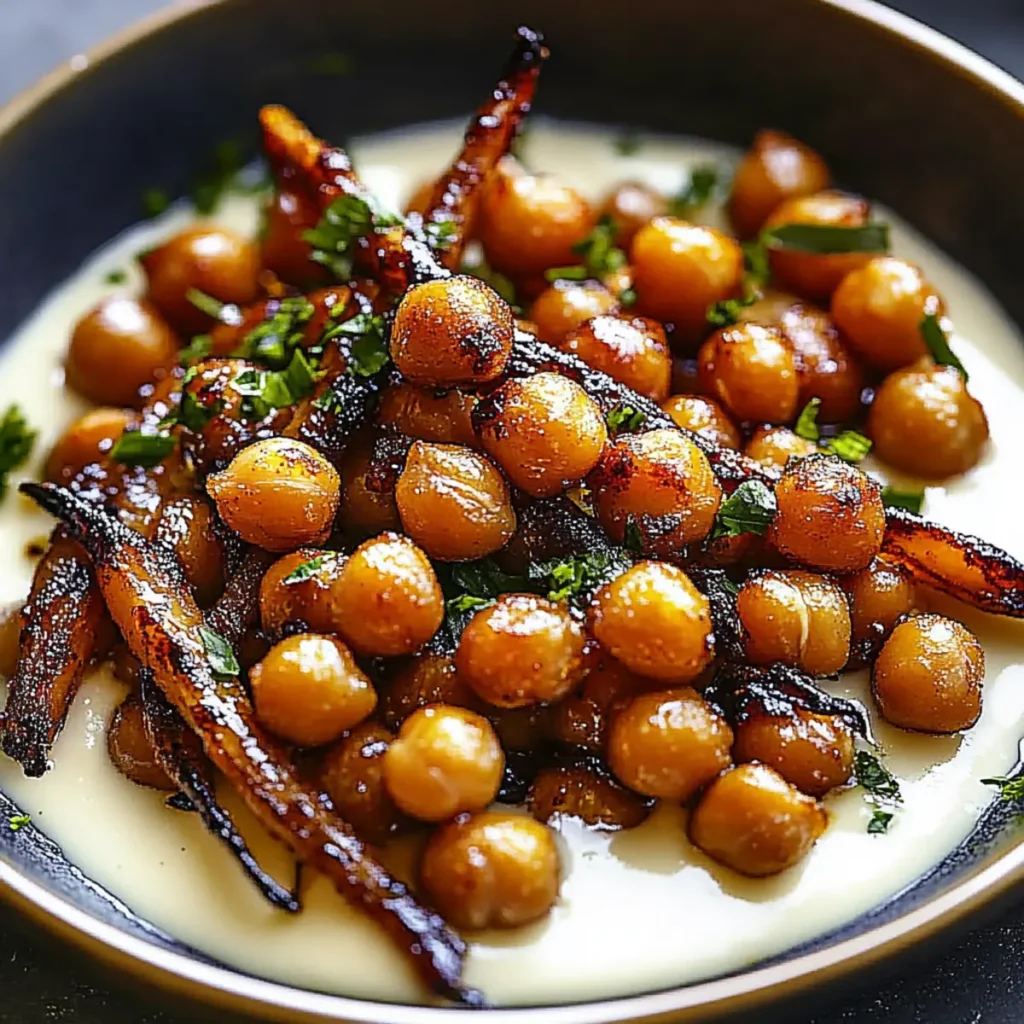
When it comes to snacking, few things can rival the flavor explosion of Sweet and Spicy Roasted Chickpeas. Imagine crunchy chickpeas, perfectly roasted to a golden brown, cloaked in a delightful dance of honey sweetness and fiery cayenne heat. With every bite, you’ll experience that satisfying crunch juxtaposed against the cozy warmth of smoked paprika. This addictive snack isn’t just a guilty pleasure; it’s a culinary adventure in your mouth that you simply can’t resist. Let me take you back to times spent in cozy kitchens, laughing and experimenting with foods that might seem ordinary but turn extraordinary with a sprinkle of creativity! The craving for something crunchy leads many of us to the usual bag of chips, but why not elevate your snacking game? Sweet and Spicy Roasted Chickpeas are perfect for binge-watching your favorite series, enjoying a picnic in the park, or simply impressing your friends at your next gathering. Trust me; once you make these, the only thing that will let you down is the empty bowl when it’s all gone! Ingredients for Sweet and Spicy Roasted Chickpeas Here’s what you’ll need to make this delicious Sweet and Spicy Roasted Chickpeas: 1 can (15 oz) low-sodium chickpeas – These little legumes provide a hearty base for your snack, offering protein and fiber to keep you satisfied. 2 tbsp olive oil – Not only does this add flavor, but it also helps achieve that perfect crunch when roasting. 1 tbsp honey or maple syrup – Sweetness is key here; use honey for a more traditional sweetness or maple syrup if you want a vegan option. 1 tsp cayenne pepper – Adjust according to your spice tolerance; it provides a zesty kick to balance the sweetness. 1 tsp smoked paprika – This ingredient adds a complex, smoky flavor that elevates the roasted chickpeas to the next level. ½ tsp sea salt – A little salt to enhance all the other flavors and bring out the best in your chickpeas. How to Make Sweet and Spicy Roasted Chickpeas Follow these simple steps to prepare this delicious Sweet and Spicy Roasted Chickpeas: Step 1: Preheat the Oven Begin by preheating your oven to 400°F (200°C). This step is essential for turning those chickpeas into the crispy snacks we crave. You’ll want that heat screaming hot for optimal roasting. Step 2: Prepare the Chickpeas Drain and rinse the chickpeas thoroughly to remove any excess sodium. Pat them dry with a paper towel to ensure they roast well. The drier they are, the crunchier the outcome! Step 3: Seasoning Magic In a large mixing bowl, toss those dried chickpeas with olive oil, honey or maple syrup, cayenne pepper, smoked paprika, and salt. Make sure each chickpea is well-coated with the delicious mixture – this is where the flavor really starts to develop! Step 4: Spread and Roast Spread the seasoned chickpeas in an even layer on a baking sheet lined with parchment paper. This step keeps chickpeas from sticking and aids in the crispiness. Roast them in your preheated oven for about 25-30 minutes, stirring halfway through to ensure even crisping. Step 5: Cooling Time Once golden brown and crunchy, it’s time to take them out and let them cool slightly. This cooling period allows them to firm up even more, giving you that satisfying crunch that will keep you going back for more. Step 6: Serve and Enjoy Transfer your perfectly roasted chickpeas to a bowl and serve them up! Whether you nibble on them alone or toss them into a salad or dish, enjoy the medley of flavors that explode with each bite. Sweet and Spicy Roasted Chickpeas are not just a snack; they are a versatile addition to any meal! You can sprinkle them on a salad for added crunch or enjoy them as a stand-alone treat. However you choose to enjoy them, they’re bound to steal the spotlight at your next gathering. So go ahead, hit that oven, and experience the delightful crunchy goodness for yourself! Perfecting Sweet and Spicy Roasted Chickpeas Cooking Process To achieve the perfect Sweet and Spicy Roasted Chickpeas, start by preheating your oven, and while it warms up, rinse and dry the chickpeas. Toss them in the flavorful coating before spreading them on a baking sheet. Add Your Touch to Sweet and Spicy Roasted Chickpeas Feel free to customize the spice level by adding more cayenne or even a dash of chili powder. You can also swap honey for agave or maple syrup, and experiment with other spices like garlic powder or cumin for added depth. Storing & Reheating Sweet and Spicy Roasted Chickpeas Store your Sweet and Spicy Roasted Chickpeas in an airtight container at room temperature for up to a week. If you want to re-crunch them, pop them back in a preheated oven for a few minutes to refresh their texture. When I first made these Sweet and Spicy Roasted Chickpeas for a family gathering, everyone thought I had transformed into a gourmet chef overnight. Their crunch and flavor left my relatives asking for the recipe—an unforgettable moment! FAQs About Sweet and Spicy Roasted Chickpeas What is Sweet and Spicy Roasted Chickpeas? Sweet and Spicy Roasted Chickpeas are a delicious snack made from canned chickpeas tossed in a blend of honey or maple syrup, cayenne pepper, smoked paprika, and olive oil. After a toasty roast in the oven, they become irresistibly crunchy and flavorful. This recipe balances sweet and spicy elements, making it a satisfying alternative to traditional snacks like chips. Not only do they offer a satisfying crunch, but they are also packed with protein and fiber, making them a healthy choice for snacking. How do I store Sweet and Spicy Roasted Chickpeas? To keep your Sweet and Spicy Roasted Chickpeas fresh and crunchy, store them in an airtight container at room temperature. They can remain tasty for up to a week, but you may find they lose a bit of their crunch over time. If you want to