
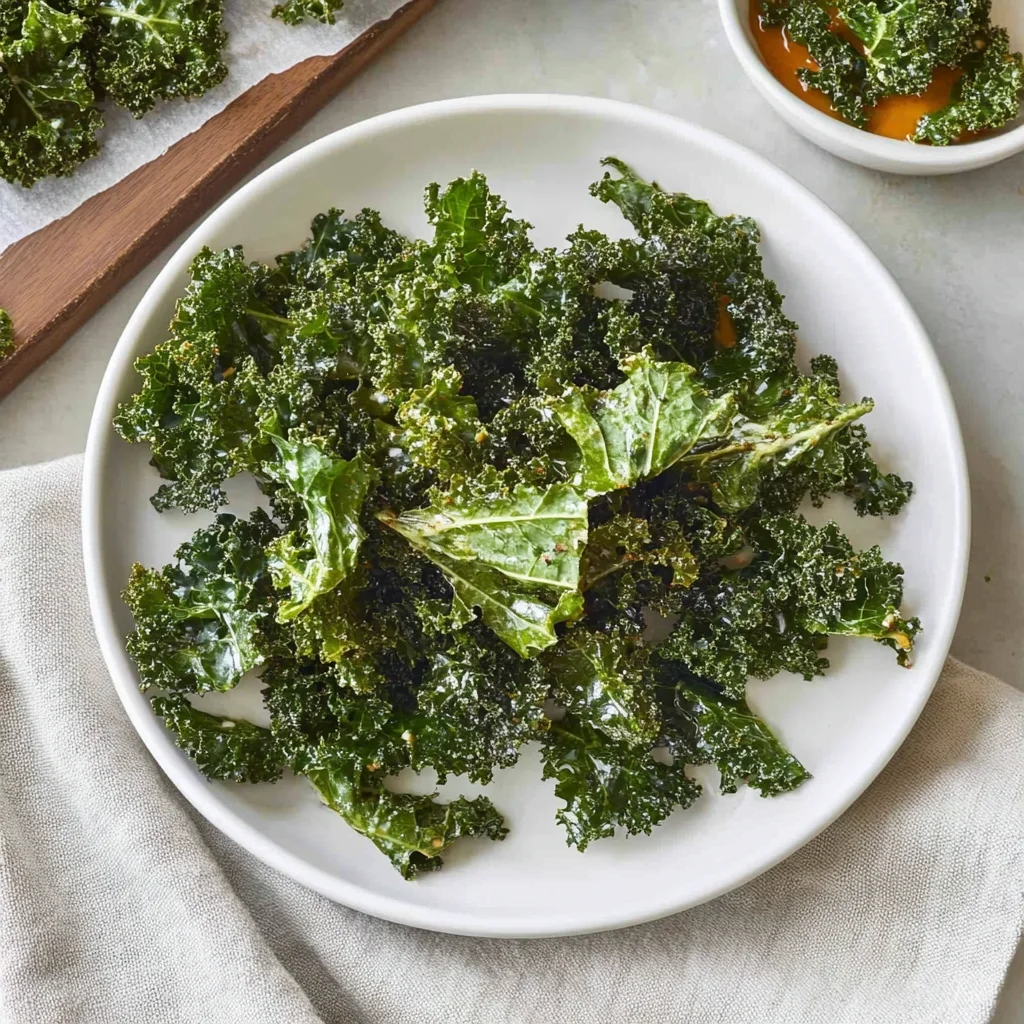
Imagine the delightful crunch of crispy kale chips, a snack that transforms a humble green into a flavor-packed experience that dances on your taste buds. Each bite offers an irresistible blend of earthy richness and a satisfying crispness that makes you question why you ever reached for potato chips instead.
I still remember the first time I made kale chips, watching my friends’ skeptical faces morph into surprise as they devoured them at our movie night. Perfect for any occasion, these healthy bites promise to elevate your snacking game while delivering an explosion of flavor that will have you coming back for more.
Why Will You Keep Making kale chips?
Crispy delight: These kale chips are incredibly crunchy, offering a satisfying snack that beats traditional chips.
Nutritious boost: Packed with vitamins A, C, and K, they’re a guilt-free indulgence that you can enjoy anytime.
Quick prep: With just 10 minutes of prep and 20 minutes in the oven, you’ll have a healthy snack ready in no time!
Flavor options: Customize them with garlic powder or nutritional yeast for an irresistible cheesy twist.
Crowd-pleaser: Perfect for parties or as a light snack at home, everyone loves these tasty greens!
kale chips Ingredients
- 1 bunch kale (washed and dried) – Fresh kale provides a nutritious base that crisps up beautifully, making it the star of your kale chips.
- 1 tablespoon olive oil (extra virgin) – This adds a rich flavor and helps the kale crisp up perfectly in the oven.
- 1 teaspoon salt (to taste) – Enhances the flavors of the kale chips; adjust according to your preference.
- 1/2 teaspoon garlic powder (optional) – Adds a delightful savory note for those who love a little extra zing in their kale chips.
- 1/2 teaspoon nutritional yeast (optional for cheesy flavor) – Sprinkle this in for a cheesy taste without dairy, making your snack even more irresistible.
How to Make kale chips

1. Preheat the oven to 300°F (150°C).
This low temperature ensures your kale chips bake evenly and get perfectly crispy without burning.
2. Prepare the kale by removing the stems and tearing the leaves into bite-sized pieces.
Using a bunch of washed and dried kale, make sure the pieces are roughly the same size for consistent cooking.
3. Combine in a mixing bowl, tossing the kale with 1 tablespoon of extra virgin olive oil, salt, garlic powder, and nutritional yeast until evenly coated.
The oil will help crisp the leaves while adding flavor; feel free to adjust salt to your taste!
4. Spread the kale evenly on a baking sheet in a single layer.
This step allows for maximum air circulation, ensuring that every piece becomes delightfully crunchy.
5. Bake in the preheated oven for 15-20 minutes, or until the edges are crispy but not burnt.
Keep an eye on them; they can go from perfect to burnt quickly!
6. Cool on the baking sheet before serving.
Letting them cool will help maintain their crunchiness for that satisfying snack experience.
Optional: Sprinkle with a little extra nutritional yeast for added cheesy flavor!
Exact quantities are listed in the recipe card below.
Tips for the Best kale chips
- Kale Selection: Choose vibrant, fresh kale with no wilting or browning. This ensures your kale chips are flavorful and crispy.
- Dry Thoroughly: Make sure to wash and dry the kale thoroughly. Excess moisture can lead to soggy chips instead of that delightful crunch.
- Oil Distribution: Use just enough olive oil to coat the leaves evenly. Too much oil will make them greasy; too little won’t allow for crispiness.
- Single Layer Baking: Spread the kale in a single layer on the baking sheet. Overcrowding causes steaming rather than baking, resulting in chewy kale chips.
- Watch the Time: Keep an eye on the chips during the last few minutes of baking. They can go from crispy to burnt quickly, so check often!
- Cooling is Key: Allow your kale chips to cool completely before serving. This final step helps them maintain that perfect crunch!
How to Store and Freeze kale chips
- Room Temperature: Enjoy your kale chips fresh for up to 3 days by storing them in an airtight container in a cool, dry place to maintain their crispiness.
- Fridge: If you have leftover kale chips, keep them in the fridge in a sealed bag for up to 5 days. This helps retain their freshness, though they may lose some crunch.
- Freezer: For longer storage, freeze kale chips in a freezer-safe bag. They can last up to 2 months but may lose their crisp texture upon thawing.
- Reheating: To revive the crunch, reheat your kale chips in the oven at 350°F for about 5 minutes. Enjoy them as if they were freshly made!
kale chips Your Way
Feel free to get creative and elevate your homemade snack with these delightful twists!
- Spicy: Add 1/4 teaspoon cayenne pepper for a fiery kick. This will give your chips a bold, zesty flavor that warms the palate. Perfect for those who enjoy a bit of heat in their snacks!
- Cheesy: Swap nutritional yeast with 1 tablespoon grated Parmesan cheese for a savory twist. This addition brings a rich, cheesy flavor that pairs beautifully with the earthy taste of kale.
- Sweet: Drizzle a bit of honey before baking for a sweet-savory combo. The sweetness balances the natural bitterness of kale, creating an unexpected yet delightful treat!
- Herb-Infused: Toss in 1 teaspoon dried oregano or thyme for an aromatic touch. These herbs will add depth and complexity, making your chips feel gourmet and inviting.
- Lemon Zest: Sprinkle in some lemon zest before baking to brighten up the flavors. The citrus notes will elevate your kale chips, giving them a refreshing burst that’s hard to resist.
- Asian-Inspired: Add 1/2 teaspoon sesame oil and sprinkle with sesame seeds after baking. This twist imparts nutty flavors and adds a lovely crunch, transforming your snack into something uniquely delicious.
- Smoky: Incorporate 1/2 teaspoon smoked paprika for a rich, smoky taste. This variation beautifully complements the crunchiness of the chips while adding an intriguing depth of flavor.
- Balsamic Glaze: Drizzle balsamic glaze over freshly baked chips for a tangy finish. This sophisticated touch enhances both flavor and presentation, making your snack feel extra special!
Make Ahead Options

You’ll love how easy it is to prep these crispy kale chips in advance, making them a delightful and nutritious snack ready whenever you are! Start by washing and drying your bunch of kale, then remove the stems and tear the leaves into bite-sized pieces. You can also toss the kale with olive oil, salt, garlic powder, and nutritional yeast up to 24 hours ahead of time and store it in an airtight container in the fridge. When you’re ready to enjoy your kale chips, simply spread them on a baking sheet and bake in a preheated oven at 300°F (150°C) for 15-20 minutes until they’re perfectly crispy. Just remember to keep an eye on them to avoid burning! This way, you’ll have a healthy snack prepared in no time.
kale chips Recipe FAQs
What type of kale is best for making kale chips?
Curly kale is the most popular choice for making kale chips due to its sturdiness and ability to crisp up nicely. However, Lacinato (also known as dinosaur) kale can also work beautifully, offering a slightly different texture and flavor. Just make sure your kale is fresh, vibrant green, and free from any blemishes or wilting.
How do I store leftover kale chips?
Store your leftover kale chips in an airtight container at room temperature for up to 3 days. To maintain their crispiness, avoid refrigerating them, as moisture can make them soggy. If you’re worried about them losing crunch, you can re-bake them in a preheated oven at 300°F (150°C) for about 5-10 minutes to revive that satisfying crunch!
Can I freeze kale chips for later?
While it’s possible to freeze kale chips, it’s not recommended since freezing can lead to a loss of their delightful crispiness. If you must freeze them, place them in an airtight freezer bag with as much air removed as possible and consume within 1 month. When you’re ready to enjoy them again, simply bake from frozen at a low temperature until crispy.
What should I do if my kale chips are soggy after baking?
Soggy kale chips can occur if the leaves were not dried thoroughly after washing or if they were overcrowded on the baking sheet. Ensure you wash and dry your kale well before tossing it with oil and seasoning. When spreading on the baking sheet, arrange the leaves in a single layer without overlapping. If they still turn out soggy, try increasing the oven temperature slightly or extending the baking time by a few minutes while keeping an eye on them.
How many servings does this recipe yield?
This recipe yields approximately 4 servings of deliciously crunchy kale chips! Each serving contains only about 50 calories, making it a guilt-free snack option that’s perfect for sharing with family or enjoying on your own during movie night.
Are there any dietary considerations I should be aware of when making kale chips?
Kale chips are naturally gluten-free and vegan, making them suitable for various dietary preferences. If you’re watching sodium intake, adjust the amount of salt used according to your taste. Additionally, if you’re following a nut-free diet, rest assured that this recipe contains no nuts. You can also omit the garlic powder and nutritional yeast if desired!